Picture this: You have taken a screenshot of the webpage but want to focus on a specific part or remove some part. Now, you are wondering how to crop screenshots on Mac!
If this is the case, we have got you covered.
In this article, we will provide you with complete guidance on how to crop screenshots on Mac. Therefore, you can crop the screenshot to your liking.
However, before diving deep into how to crop screenshots, let us first understand why we crop a screenshot.
Also read: How To Update OS On Mac: Easy Guide
Reasons to crop a screenshot
There are many reasons to crop a screenshot on Mac. For example, you want to share a specific part of the webpage or document with someone. In this case, you are required to crop a screenshot.
Besides this, you must focus on the specific part whenever you want to create engaging presentations or tutorials. Therefore, the user does not get distracted.
This next section will discuss different ways to take a screenshot on a Mac.
Also read: Which Apple Macbook Pro Should You Buy?
Essential Keyboard Keys For Taking Mac Screenshots
There are three main keys essential for taking Mac screenshots.
- To take the whole screen screenshot – Shift + Command + 3
- Take a screenshot of the part of the screen – Shift + Command + 4
- To take a screenshot of the window or menu – Shift + Command + 4 + Space bar.
How to crop screenshots on Mac
After taking the screenshot, here are different ways that you can use to crop the screenshot.
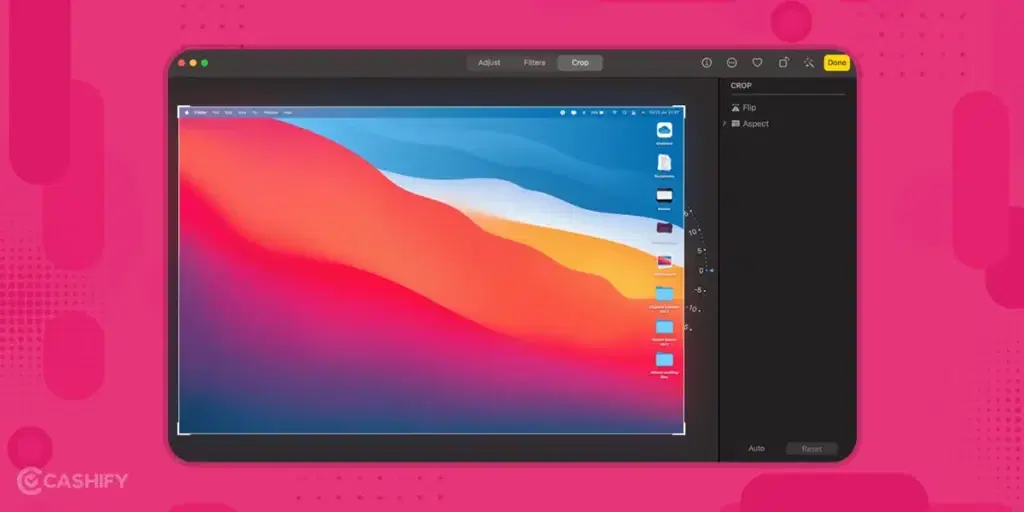
1. Using an in-built crop tool
If you use MacOS Mojave or later, an in-built cropping tool can take the cropped screenshot on Mac. Here are the steps that you need to follow.
- First, open the screenshot. For that, double-click on it. After that, access the Markup Toolbar.
- Now, you need to click on the Crop button.
- Then, drag the corners of the crop box. Select the part of the image/screenshot that you want to keep. You can even set and adjust the size and position of the crop box. To do this, you need to click and drag the edges.
- Once you have taken the screenshot, click on the “Done” button in the bottom right corner of the window.
- You can save this screenshot by clicking on File -> Save or using the keyboard key Command + S.
Also read: Best MacBook Accessories To Unlock The Full Potential Of Your MacBook
2. Use Built-in Photos App
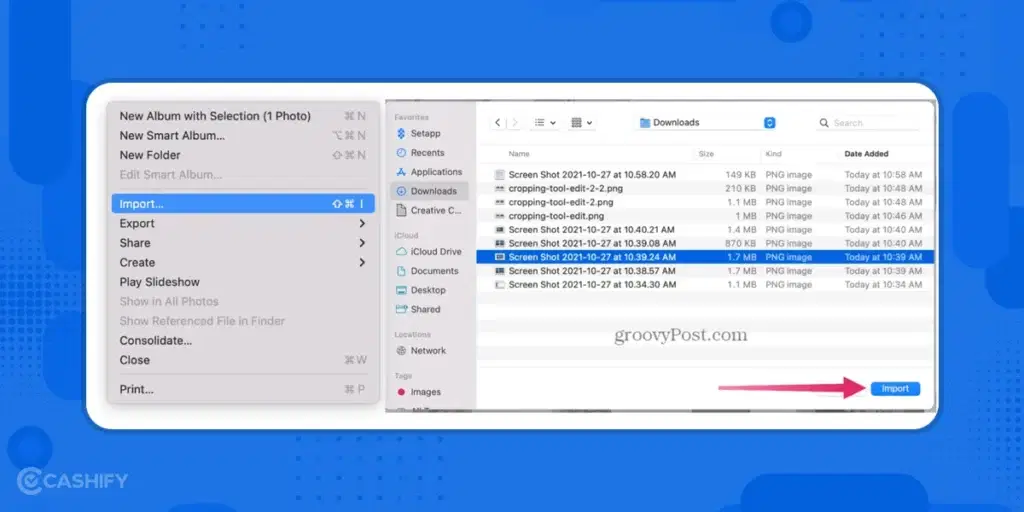
It is another built-in tool that you can use to crop the screenshot. To use this app, you need to follow the steps below.
- First, open the Photos App.
- After that, click on File -> Import.
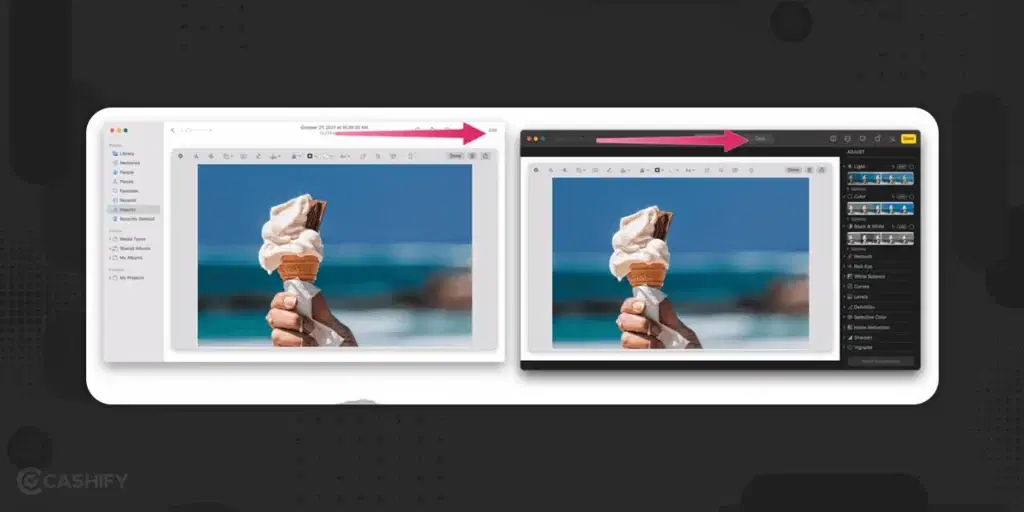
- Double-click on the image that you recently imported.
- Click on Edit
- After that, select the Crop button.
Also read: Apple WWDC 23: New Macs launched!
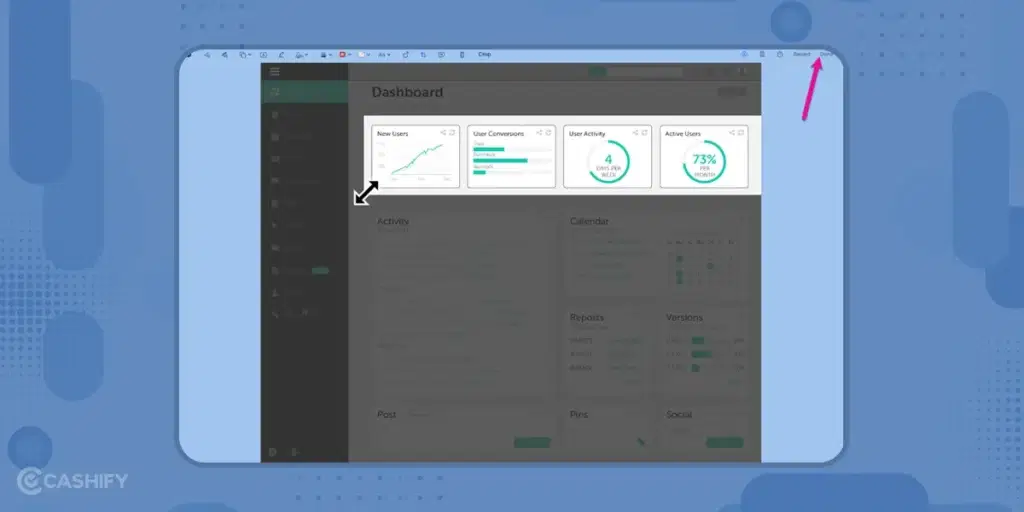
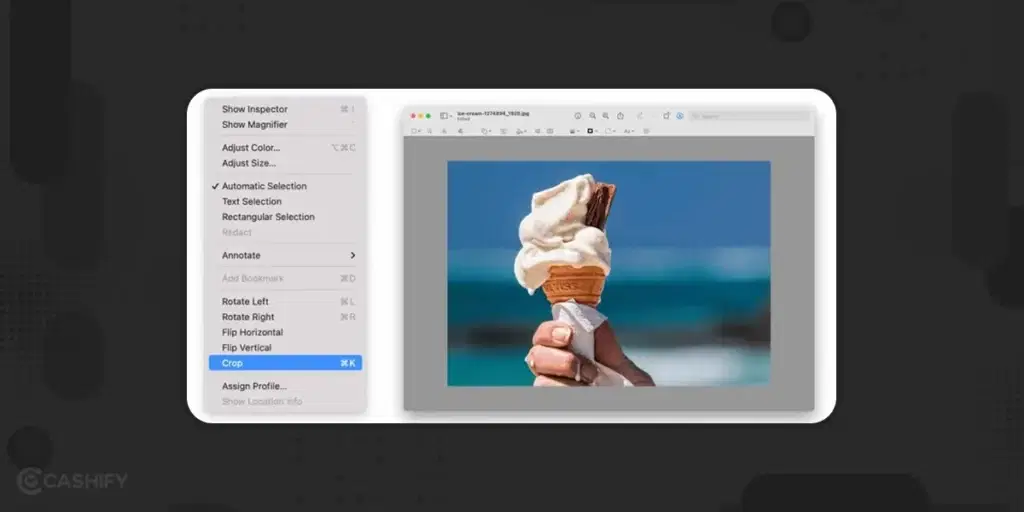
3. Using the Preview App
If you are using macOS and double-click on any image, it will open the Preview app by default. Using it, you can crop your screenshot quickly. To do so, you need to follow the steps below.
- First, double-click on the image. It will open the Preview app.
- After that, you will see the Pencil-like tool icon, Show Markup Toolbar, at the top right. Click on that.
- After that, click and drag the area that you wish to keep.
- Click on the Tools from the Menubar.
- Now, select Crop.
If you don’t want to use the built-in tool to crop the screenshots on Mac, this next section will help you to crop screenshots through third-party tools.
Also read: Is The 2020 M1 MacBook Air Still A Worthy Buy In 2024?
Let’s take a crop screenshot using third-party tools.
Here, we have rounded up some third-party tools that you can use to crop screenshots on Mac.
1. Skitch

Featuring first on the list is Skitch. This tool is the part of the Evernote. Skitch is a free, easy-to-use, and multi-purpose editing tool that helps you resize and crop screenshots. This tool incorporates various features like doodling capability, image annotation, and watermarking. Click here to download the app.
Also read: How To Access iPhone From Mac?: 5 Easy Ways
2. Sangit
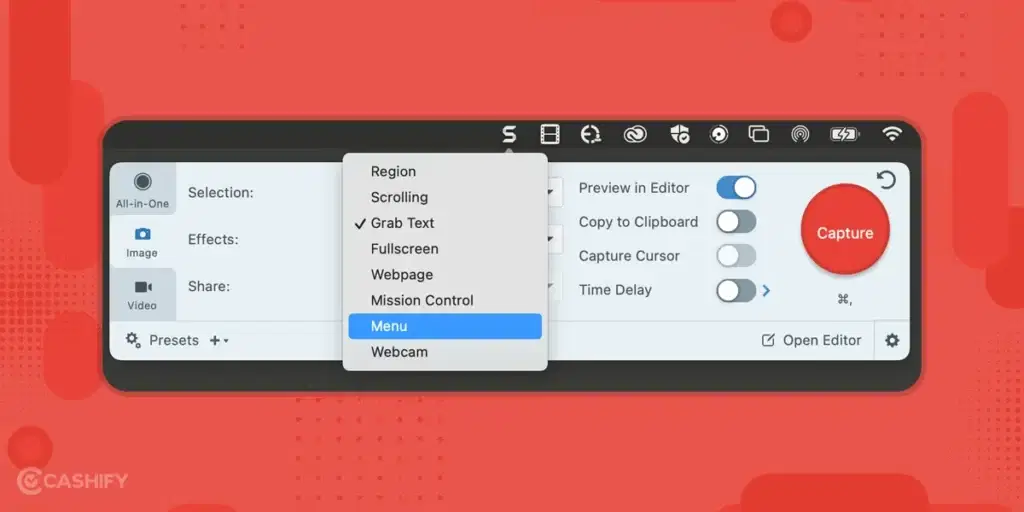
The next on the list is Sangit. This tool lets you easily and quickly capture screenshots during presentations, videos, and more. It is one of the most recommended tools to capture screenshots.
Whether you require a specific region or a full-screen screenshot, Sangit is the perfect pick. All you need to do is select the part and click on the Capture button. You can click here to download the app. The only downside of this app is that it is not free.
Also read: How To Transfer Files From Mac To PC?
3. AirSketch

Coming up next on the list is AirSketch. It is a user-friendly, quick, and simple screen capture app. The app comes with both free and paid versions. However, its free version has all the required basic screen capture and editing features. Click here to download the app.
Also read: macOS 14 Sonoma Features: All You Need To Know
4. Markup Hero
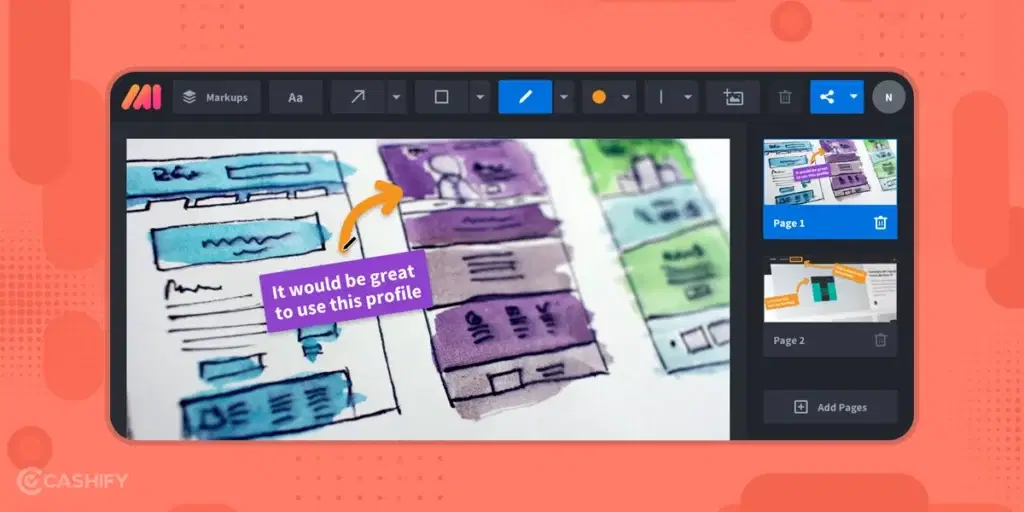
Last but not least is the Markup Hero. This app is free to use and does not require any signup. The app has a sleek, user-friendly interface. If you want to download the app, you can click here.
Also read: Clear DNS Cache On Mac: Here’s How!
Wrapping Up
In a nutshell, there are various methods to crop screenshots on a Mac, incorporating in-built options paid and free alternatives. Choose the one that fits your budget and aligns with your requirements.
Finally, we have come to the end of this article. Hopefully, this guide helped you understand how to crop a screenshot on a Mac. If you still have any queries, ask us in the comment section below.
Also read: How To Update macOS On Your MacBook? A Stupid Simple Guide
If you’ve just bought a new phone and don’t know what to do with your old phone, then here’s your answer. Sell old mobile to Cashify and get the best price for it. If you are planning to buy a new phone, check out Cashify’s refurbished mobile phones. You can get your favourite phone at almost half price with 6 6-month warranty, 15 days refund and free delivery.