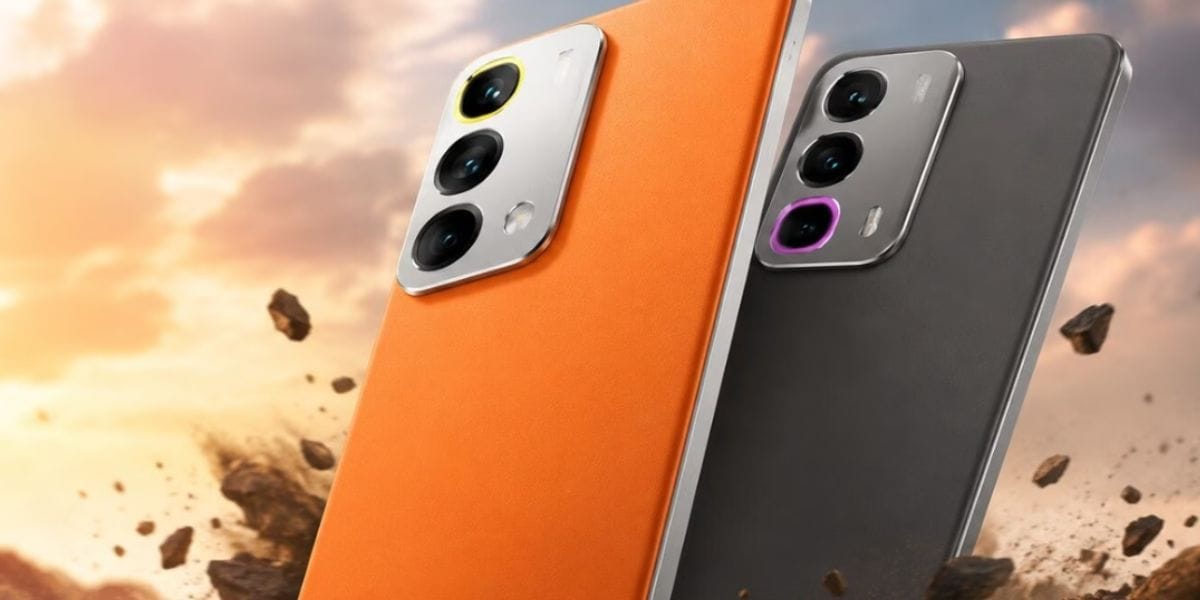
Your iPhone 17 already has one of the most powerful cameras in the world, but did you know that tweaking a few iPhone 17 camera settings can take your photos from good to amazing? Even small adjustments can improve clarity, color accuracy, low-light performance, and overall sharpness.
In this blog, we will learn how to optimize your iPhone 17 camera settings so that every shot looks professional- even if you are just snapping pictures with your phone.
Also Read: Apple iPhone 17 Pro Vs Apple iPhone 16 Pro: Major Changes Explained
What Are The Best Camera Settings For Apple iPhone 17?
Let us now have a look at the best iPhone 17 camera settings that you can try out today:
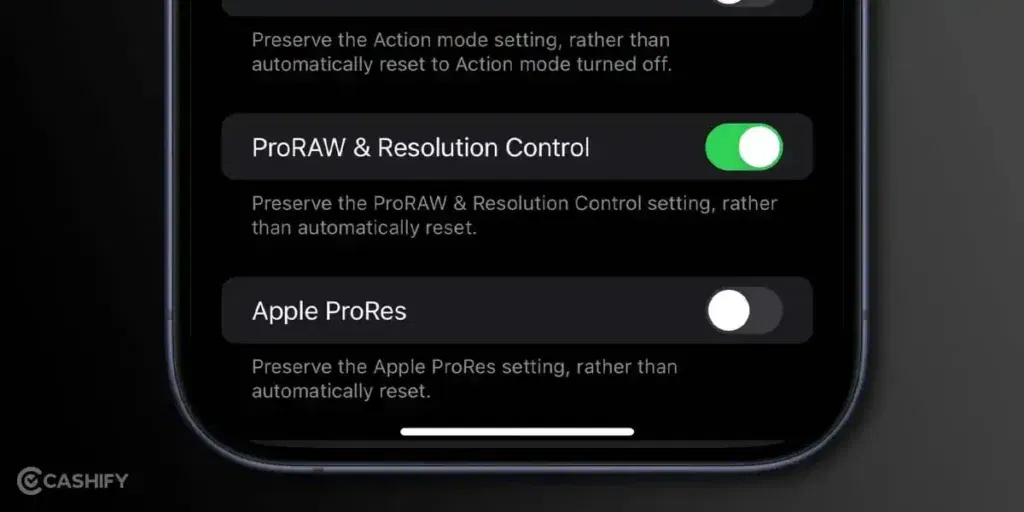
1. Turn On ProRAW & Resolution Control
How to do: Settings> Camera> Formats> Turn on ProRAW & Resolution Control
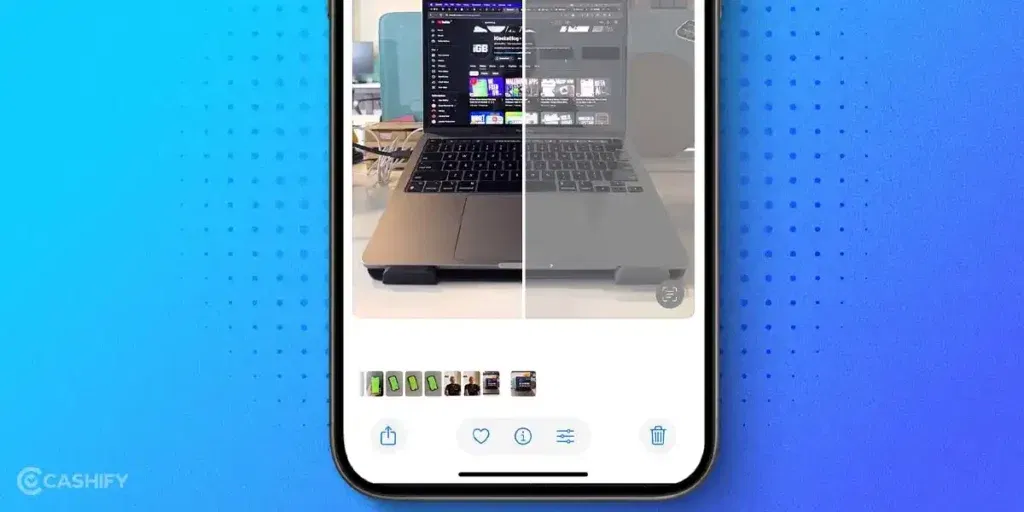
This is one of the most powerful camera settings on the iPhone 17. By default, your iPhone captures compressed photos that look good but do not contain the full detail your sensor can capture. Enabling ProRAW & Resolution Control unlocks the ability to shoot 48-megapixel photos, giving you the full sensor output.
Why it matters?
Shooting in ProRAW lets you store far more image data- especially in the highlights and shadows. That means you can later adjust exposure, color temperature, and detail without losing quality. In simpler terms, your photo becomes more flexible for editing and much sharper straight out of the camera.
You do not have to use ProRAW for every photo (since the files are large), but for important moments- landscapes, portraits, low-light shots- the extra resolution is absolutely worth it.
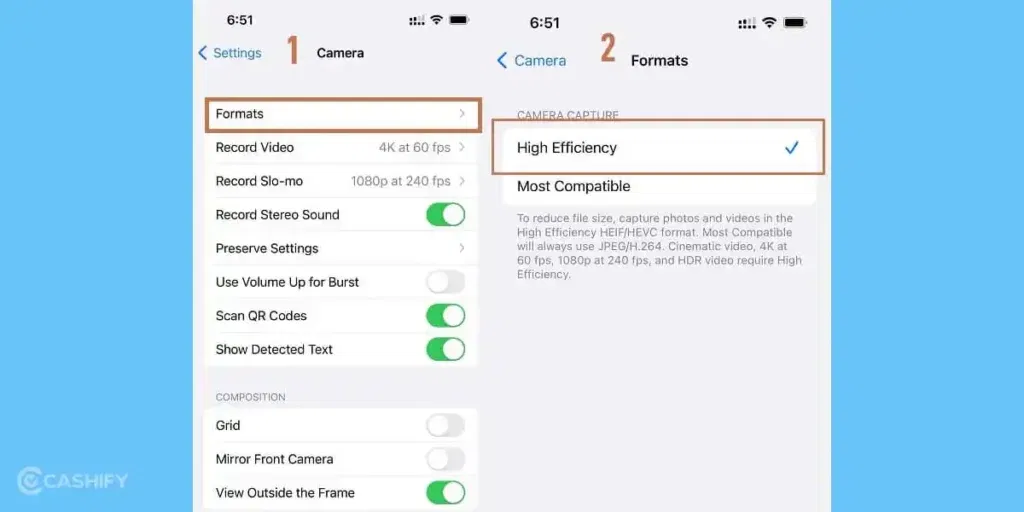
2. Choose the High Efficiency Format
How to do: Settings> Camera> Formats> Select “High Efficiency”
While you are in the Formats menu, choose High Efficiency (HEIF/HEVC). This format uses advanced compression that retains high quality at smaller file sizes- and it is the format Apple optimizes for iPhones.
Why it matters?
Compared to JPEG, High Efficiency keeps colors richer and details cleaner while taking up less space. It’s ideal if you want your photos to look great straight out of the camera, without needing post-processing.
For most users, High Efficiency is the sweet spot: it’s lightweight, fast, and visually superior for everyday photography.
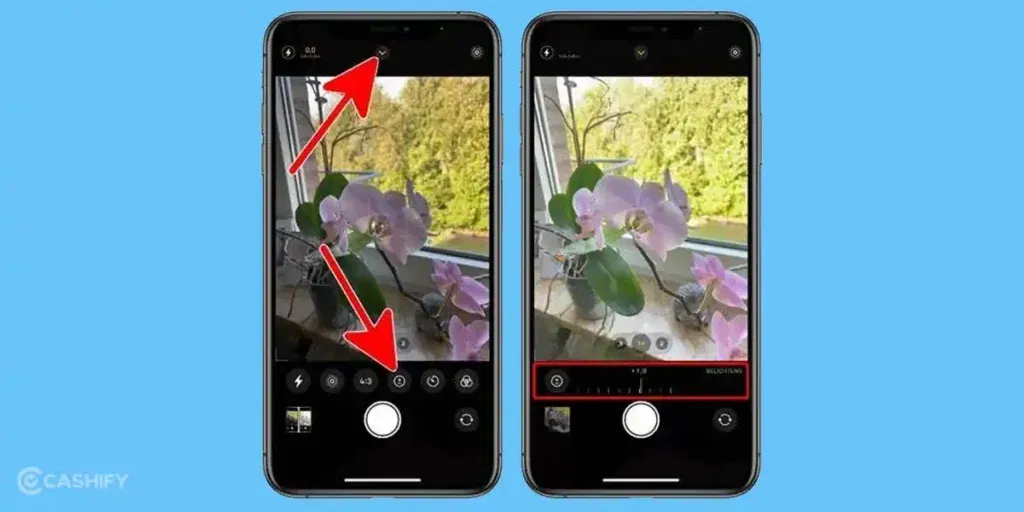
3. Adjust Exposure Compensation to –0.3
How to do: Open Camera App> Tap the arrow at the top (or swipe up)> Adjust the ± exposure icon
iPhones tend to slightly overexpose photos, meaning bright areas (like skies or white objects) can lose detail. To fix this, set your exposure compensation to –0.3 EV.
Why it matters?
This subtle adjustment keeps highlights intact, ensuring you capture more texture in clouds, reflections, and faces under bright light. It also makes colors look deeper and more balanced.
You will be surprised how much better your photos look with this small iPhone 17 camera settings- it is one of the simplest yet most effective adjustments you can make.
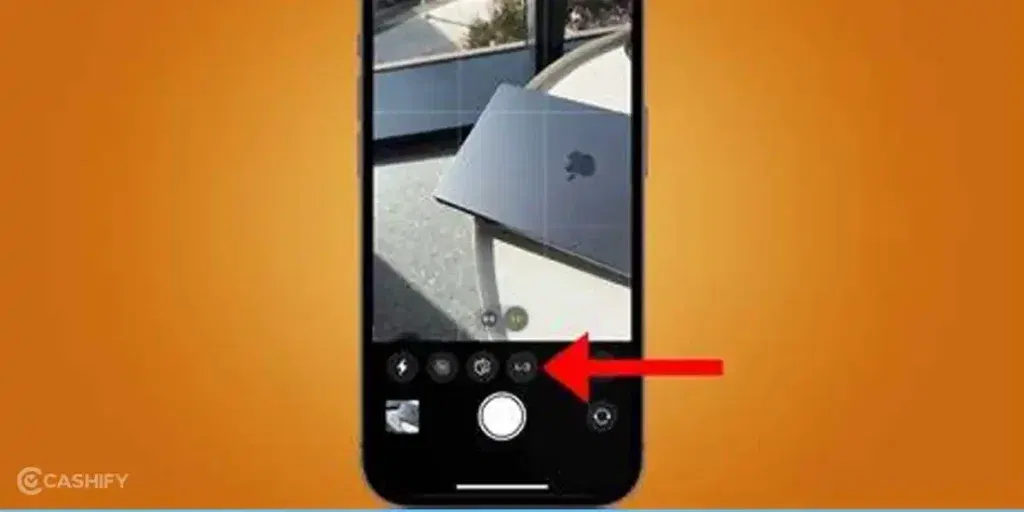
4. Set Aspect Ratio to 4:3
How to do: In the Camera app> Tap the arrow at the top (or swipe up)> Choose 4:3
Most people switch to widescreen (16:9) or square (1:1) ratios for social media- but here is the secret: your iPhone’s camera sensor is natively 4:3. Using this ratio ensures you are capturing the full sensor readout.
Why it matters?
When you shoot in 4:3, you get the maximum resolution and detail possible. Cropping to 16:9 or 1:1 actually cuts away part of the image, reducing quality.
If you want more flexibility later (for prints or editing), shoot in 4:3- you can always crop afterward.
Also Read: Apple A19 Pro Vs A18 Pro: Upgrades You Should Know
5. Disable Auto-Enhancement by Choosing the Standard Photographic Style
How to do: Settings> Camera> Photographic Styles> Choose “Standard”
Apple introduced Photographic Styles to let users customize tone and color rendering. By default, your iPhone may apply automatic enhancements to contrast, warmth, and saturation.
Switching to Standard disables these “boosts,” giving you a clean, natural image that’s easier to edit or color grade later.
Why it matters?
Auto enhancements might make photos look appealing on-screen but often create unrealistic skin tones or harsh contrasts. The Standard style ensures your photos look natural, true-to-life, and consistent.
This iPhone 17 camera settings is especially important for portraits, product photos, or any shot where color accuracy matters.
6. Use Only Default Focal Lengths
When shooting: Stick to 0.5x, 1x, 2x, 4x, or other preset zoom options.
The iPhone 17’s camera system has multiple lenses, each designed for specific focal lengths. When you use in-between zoom levels like 1.3x or 1.7x, the phone performs digital zoom- essentially cropping and enlarging the image.
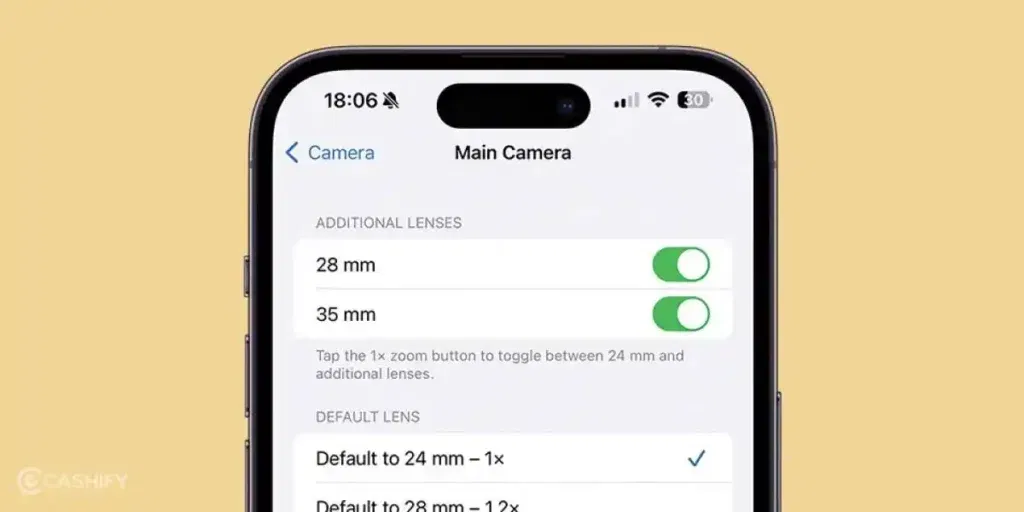
Why it matters?
Digital zoom lowers image quality, introduces noise, and reduces detail. Using native focal lengths ensures you’re using the actual optical lens, giving you the sharpest and cleanest image possible.
If you need more zoom, it is better to take a 48MP photo and crop it later- that way, you maintain full resolution and sharpness.
7. Avoid Digital Zoom Entirely (Whenever Possible)
It is tempting to pinch-to-zoom for close-ups, but remember: any zoom level that’s not a preset (0.5x, 1x, 2x, 4x) is digital zoom, which degrades image quality.
Why it matters?
Instead of zooming, physically move closer to your subject if possible. Or, shoot at full resolution and crop later in editing. You will retain far more detail that way.
This single iPhone 17 camera settings can instantly make your photos look more professional.
8. Use Macro Mode With Caution
The iPhone 17 Pro automatically switches to Macro Mode when you move close to a subject. While it is useful for extreme close-ups, it is not always necessary.
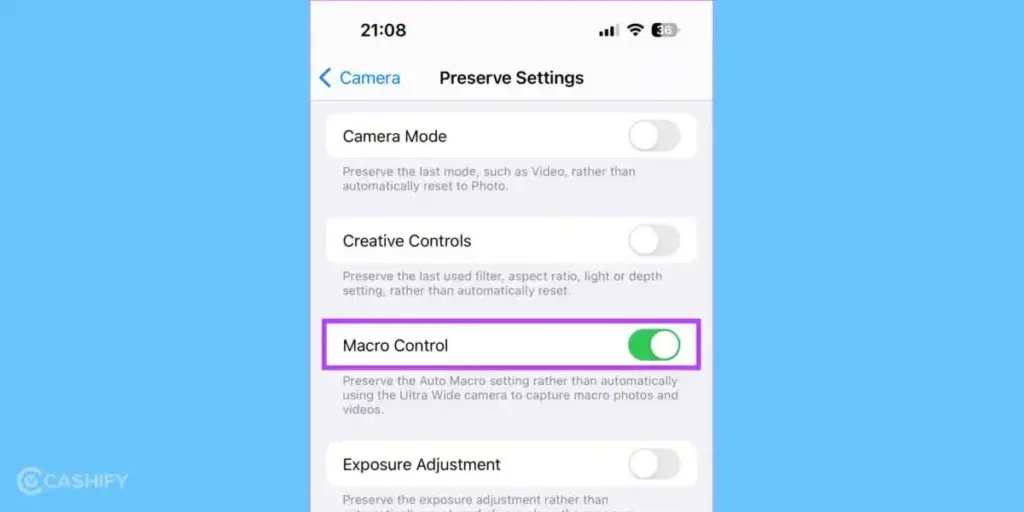
Why it matters?
The iPhone 17’s larger sensor performs beautifully even without Macro Mode- especially if you have good lighting. Macro Mode sometimes forces the lens to shift automatically, which can lead to minor focus or color inconsistencies.
Use Macro Mode when you truly need it- for flowers, jewelry, or small textures- but rely on the main camera for most close shots.
Also Read: Accessories For iPhone 17 Series: Best Chargers, Cases & Add-Ons
9. Turn On Lens Cleaning Hints
How to do: Settings> Camera> Lens Cleaning Hints> Turn On
It might sound trivial, but dirty lenses are one of the top causes of soft, hazy, or washed-out photos.

Why it matters?
When you enable Lens Cleaning Hints, your iPhone will remind you when it detects smudges or debris affecting image quality. Regularly wiping your lens with a microfiber cloth keeps photos crisp and clear- especially in bright light. This is clearly one of the best iPhone 17 camera settings.
Bonus Tip: Combine Great Settings With Smart Shooting
Settings alone do not make a great photo- they simply give you a better foundation. Here are a few simple habits that make a big difference:
- Use natural light whenever possible. Even the iPhone’s advanced HDR can’t beat soft daylight.
- Hold your phone steady. Use both hands or lean against a surface to avoid motion blur.
- Tap to focus on your subject before shooting> it ensures the camera sets the right exposure and focus point.
- Clean your lens regularly. You will be amazed how much sharper photos look after wiping off fingerprints.
- Use grid lines (Settings > Camera > Grid) to compose better-balanced shots.
Also Read: Apple iPhone 17 Pro Vs Samsung Galaxy S25 Ultra: Ultimate Comparison
Real-World Use Cases
Let’s take a look at some real-world scenarios where you can try out these iPhone 17 camera settings.
Scenario 1: Landscape Photography
When capturing wide, detailed scenes like mountains or city skylines, shoot in ProRAW 48MP and 4:3 aspect ratio. This combination ensures every texture- clouds, trees, buildings- remains crisp. Set exposure to –0.3 to preserve highlights in the sky.
Scenario 2: Portraits & People
Turn off Photographic Styles or stick with Standard to keep skin tones natural. Use the 1x lens for portraits in good light, and 2x for tighter framing. Avoid zooming in manually- cropping later gives cleaner results.
Scenario 3: Low Light or Night
ProRAW performs beautifully in low light. Set 4:3 aspect ratio, keep the phone steady, and use slight underexposure to avoid blown-out lights. You can brighten shadows later while retaining color accuracy.
Scenario 4: Product or Food Photography
For up-close detail, use Macro Mode if needed, but test both Macro and Standard to see which looks sharper. Enable Lens Cleaning Hints to ensure your lens is spotless- smudges are especially noticeable under indoor lighting.
What to Expect After These Changes?
Once you adjust these iPhone 17 camera settings, you will notice:
- Sharper textures (especially in foliage, fabrics, and architecture)
- Richer, more balanced colors
- More natural-looking tones without excessive saturation
- Better control in editing apps
- Cleaner low-light results
Your photos will look less “processed” and more “real,” like they came from a dedicated camera rather than a phone.
A Few Things To Keep in Mind
- Storage: RAW and 48MP files are large. Keep iCloud or an external backup ready.
- Editing: To make the most of ProRAW, learn basic editing- it is simple but transformative.
- Battery: Shooting and processing large files can use more power. If you are traveling or shooting all day, bring a battery pack.
- Practice: Try these settings in different lighting and subjects. You will quickly find your favorite workflow.
Final Thoughts
With the iPhone 17, you already have a powerhouse camera in your pocket. All you need is to tweak these iPhone 17 camera settings and you can significantly boost your photo quality.
Whether you are capturing sunsets, portraits, or action shots, these adjustments let you take professional-looking photos without extra equipment.
Start experimenting today, and you will notice a huge difference in clarity, color, and detail in all your iPhone 17 photos.
Also Read: Cheapest Country To Buy iPhone 17: Global Price Comparison
Frequently Asked Questions
1. How to improve iPhone 17 camera photo quality?
To boost photo quality, enable ProRAW & Resolution Control to capture detailed 48MP images, choose High Efficiency format for better color, and use the 4:3 aspect ratio for full sensor output. Avoid digital zoom, use Standard Photographic Style, set exposure to –0.3, and keep your lens clean for consistently sharp, vibrant shots.
2. How do I stop my iPhone camera from changing picture quality?
Go to Settings> Camera> Photographic Styles and select Standard to prevent automatic enhancements. Also, disable Scene Detection and avoid switching between zoom levels that trigger different lenses. Shooting in ProRAW or High Efficiency format ensures consistent quality and color. Keep lighting and lens conditions stable for uniform photo results.
3. Why are my iPhone pictures so low quality?
Low-quality photos often result from digital zoom, poor lighting, or dirty lenses. Avoid in-between zoom levels, clean your camera regularly, and use the main lens (1x) in good light. Ensure ProRAW & Resolution Control is enabled and the High Efficiency format is selected. Disabling auto enhancements also keeps image clarity consistent.
If you’ve just bought a new phone and don’t know what to do with your old phone, then here’s your answer. Sell old mobile to Cashify and get the best price for it. If you are planning to buy a new phone, check out Cashify’s refurbished mobile phones. You can get your favourite phone at almost half price with Six-month warranty, 15 days refund and free delivery.