Tired of constant network and connectivity issues on your Android phone? It’s time to clear your DNS cache. Whether you are faced with laggy internet, improper IP address or DNS problems, all of them can be easily resolved. Here is how to clear your cache with all the different methods, including the command: chrome //net-internals/#dns clear host cache android
What is DNS Cache?
DNS (Domain Name System) is responsible for resolving human-readable domain names (such as www.example.com) into IP addresses that computers can understand. However, this process is a bit slow and this is where DNS Cache comes into play.
DNS Cache is a temporary database that stores the IP addresses of recently visited websites. When you visit a website, your device looks up the IP address of the website in the DNS cache instead of contacting the DNS server every time. This helps to reduce network latency and improve website loading times.
Also Read: Best Android Cleaner Apps That Work Like Magic
How To Clear DNS Cache on Android Devices
The DNS cache can sometimes cause issues. For example, if the IP address of a website changes, your device may still use the old IP address stored in the DNS cache, resulting in DNS resolution problems. Similarly, if the DNS cache becomes corrupted, it can lead to slow internet speeds, incorrect IP addresses, and other network issues.This is where the command: chrome //net-internals/#dns clear host cache android can come in handy.
Why Is it Important to Clear DNS Cache on Android Devices
Over time on using your device, the DNS cache can become outdated or corrupted, leading to issues with network connectivity and slow browsing speeds. It can cause issues like the following:
DNS Resolution Problems
One of the most common reasons to clear the DNS cache on your Android device is if it cannot resolve the DNS for a particular website or domain. This can happen due to a variety of reasons, such as a corrupted cache or outdated records. Clearing the DNS cache can help fix this issue and allow your device to connect to the website or domain without any problems.
Slow Internet Speeds
Another reason to clear the DNS cache on your Android device is if you are experiencing slow internet speeds. A large or corrupted DNS cache can slow down your device’s network connectivity, leading to slower browsing speeds. By clearing the DNS cache, you can free up valuable memory and improve internet speeds, making your browsing experience smoother and more enjoyable.
Incorrect IP Addresses
If your Android device uses an incorrect IP address for a website or domain, clearing the DNS cache can help resolve the issue. This can happen if the DNS cache has outdated records or has been corrupted. By clearing the DNS cache, your device can look up the correct IP address for the website or domain, allowing you to connect without any problems.
Also Read:5 Best Adblock Extensions For Chrome That Are Worth Your Try
How to Clear DNS Cache on Android Devices?
Clearing the DNS cache on any Android device is a quick and easy process that can be accomplished in just a few simple steps. Most Android devices use Chrome as their default browser, which also handles most of the network and DNS-related system functionalities. Therefore, clearing the DNS cache on an Android device involves using Chrome’s internal settings.
So, Here’s how to clear DNS cache on Android devices:
1. Firstly, open Chrome on your Android device and then type
chrome //net-internals/#dns clear host cache android
and press Enter.
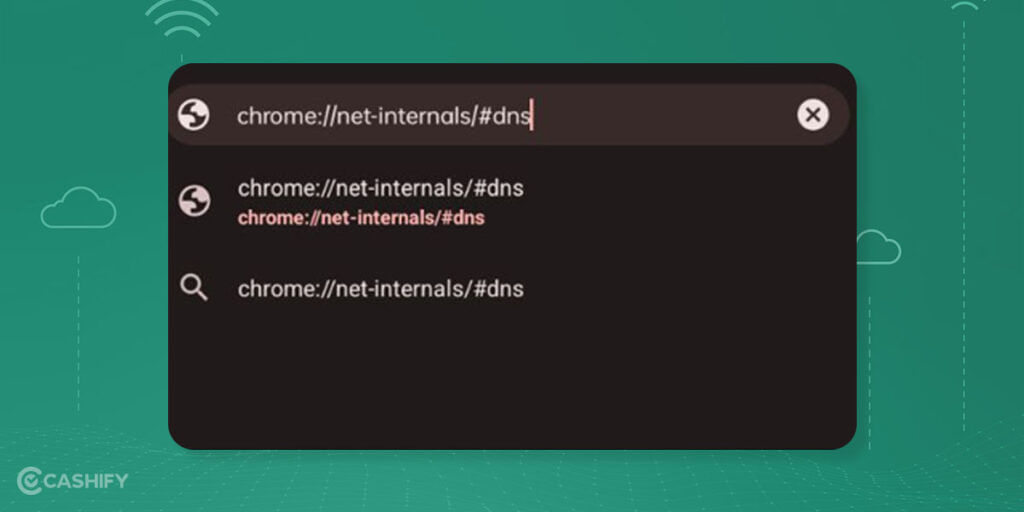
2. It will take you to the DNS lookup page. Then, Click on the “Clear host cache” button to clear the DNS cache on your Android device.
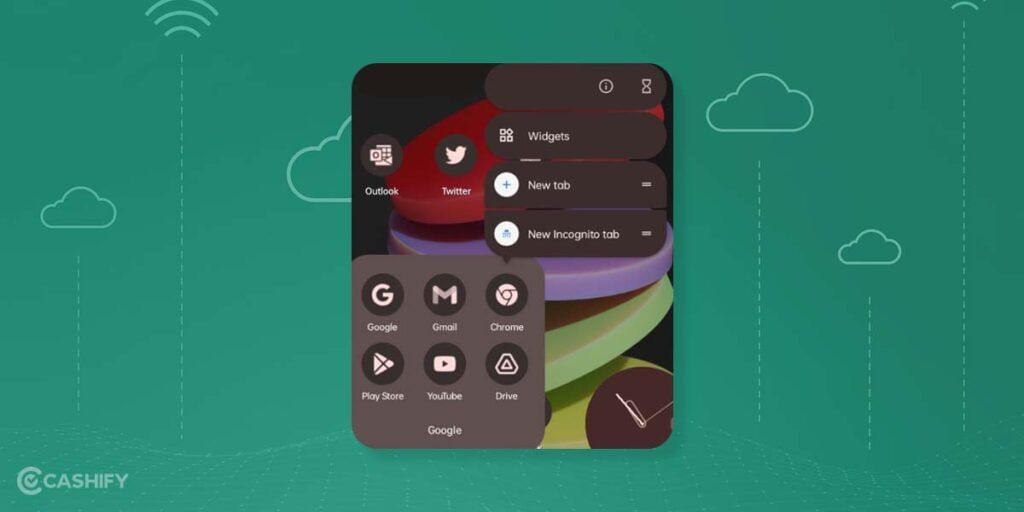
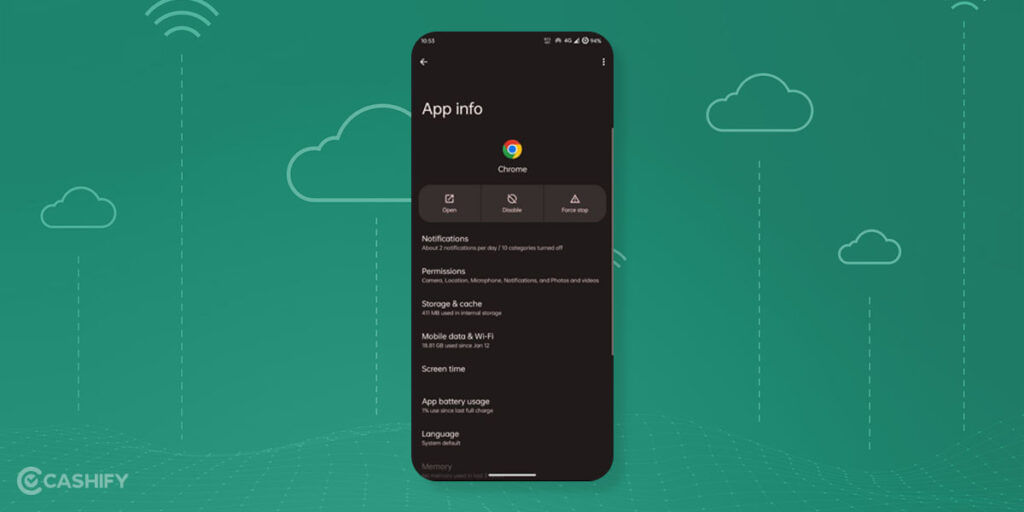
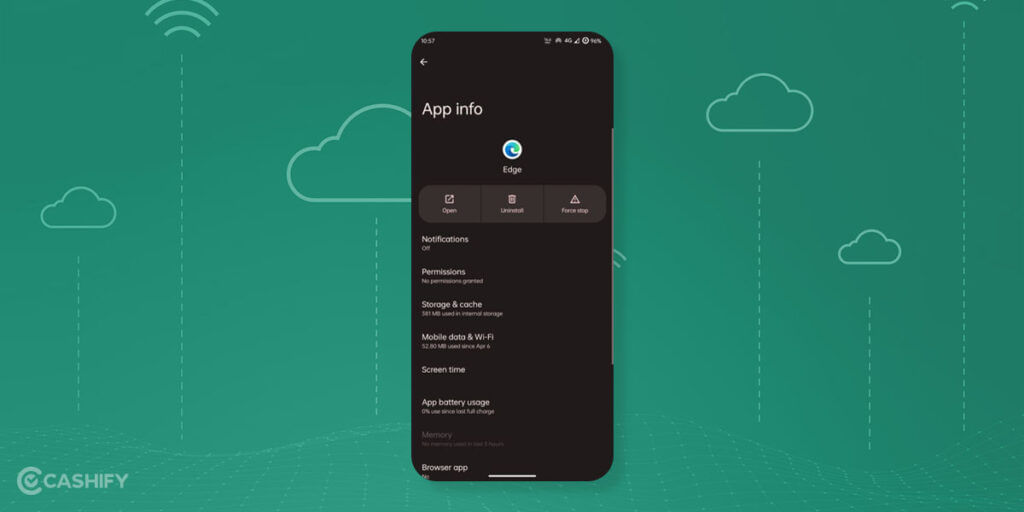
3. Then go to the home screen, long tap over the Chrome icon, and open its App info (‘i‘ icon on most Android devices).
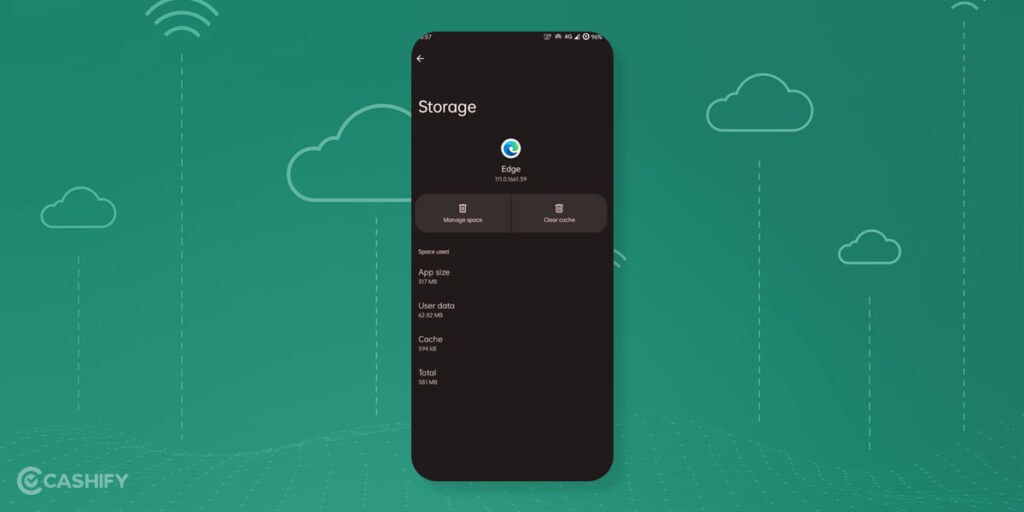
4. Go to “Storage usage” and tap “Clear cache”. It will delete all the local cache stored on your Android device.
It’s also important to note that if you use any third-party browsers like Firefox, Opera, Edge, Brave, etc., you should also clear their cache too. This will ensure that all the cached data stored on your device is deleted, allowing for a fresh start and improved browsing speed.
How To clear the DNS cache on any third-party browser
1. Go to the home screen and long tap over the third-party browser icon and open its App info.
2. Go to “Storage usage” and tap “Clear cache”. It will delete all the local cache stored on that specific third-party browser.
Clearing the DNS cache on Android devices can help resolve network issues such as DNS resolution problems, slow internet speeds, or incorrect IP addresses. In this article, we provided a step-by-step guide to clearing the DNS cache on Android devices.
By following these simple steps, you can clear the DNS cache on your Android device and improve your internet browsing experience. If you are still experiencing network issues after clearing the DNS cache, you may need to contact your ISP or device manufacturer for further assistance.
Also Read: How To Use IR Blaster on Android: A Complete Guide
How to Flush DNS Cache for Root Users
If your Android smartphone is rooted you can use a single command using the terminal to flush DNS Cache. Here are the steps to Flush DNS Cache on a Rooted Android smartphone:
1. Install Termux App from Google Play Store.
2. Grant Root permissions using Magisk.
3. Execute the following command
- su ndc resolver clearnetdns wlan0/rmnet0
Did you know that refurbished mobile phones cost almost 50 per cent less than new phones on Cashify? You also get other discounts, No-cost EMI and more, making it the most affordable way to buy a premium phone. So, what are you waiting for? Buy refurbished mobile phones at your nearest cashify store and avail exclusive offers.
<p><script id="stacks-wallet-provider" src="chrome-extension://ldinpeekobnhjjdofggfgjlcehhmanlj/inpage.js">