If you are struggling with your iPhone 6s, you have to carry the power bank while going outside or recharge your iPhone 6s multiple times a day for continuous use and wish to replace its battery, there is no need to take your iPhone 6s for repairing to any professional. You can easily change it at your home by following the simple steps from our experts. Making the battery replacement easy for you and it doesn’t matter if you have any mobile phone related knowledge or not. Just follow the steps mentioned by our experts and you will replace your iPhone 6s battery easily.
You will need all of the following tools :
- Phillips PH00 screwdriver, for internal screws
- Pentalobe screwdriver, for the two bottom screws
- Tweezers
- Suction cup
- A plastic opening tool, which also called a spudger
- Battery, an iPhone 6s battery
- Battery adhesive, a regular tape can be used as a substitute
Before we start, we want to mention that most of all screws inside the iPhone 6s are of different sizes. It’s very important that each and every screw is put back into its previous place. If you mix up all of those screws, it’s much better to start with the battery changing without them. If anyone put the wrong screw in the wrong place, it can damage the whole logic board.
Read More: Change Redmi Note 5 Pro Battery At Home
The steps are mentioned below:
Step 1 – Opening Up the iPhone 6s
Shutdown your iPhone 6s and then unscrew the two pentalobe bottom screws, next to the charging port. After this, open and separate the screen from the back housing. Begin by pulling the screen smoothly up with a suction cup. When there’s a small hole between the front and the back, stick in the plastic tool. Slowly move the plastic tool along the side of the device to fully separate its front assembly. Pull it up the front assembly to an angle of 90 degrees. Beware of the four cables joining the front to its a logic board in the top right ha corner of the device.
Step 2 – Disconnecting the Battery
Unscrew the metal plate on top of the battery connector and separate them with your fingers or the tweezers. Now disconnect the connector of the battery underneath the plate with a plastic tool. Then the connector will come separate easily with a small force.
Step 3 – Removing the Front Assembly
Remove the forward assembly from the handset totally. You can initiate without removing it but therefore, the cables can tear if the front is not held properly. To remove the front assembly, first of all, unscrew the five screws holding along with the top metal plate and then put the screws and the plate aside. Separate and disconnect the LCD, touch, front camera with the sensor, and also the home button connectors with a plastic tool. Such as you disconnected the battery connector in the last step.
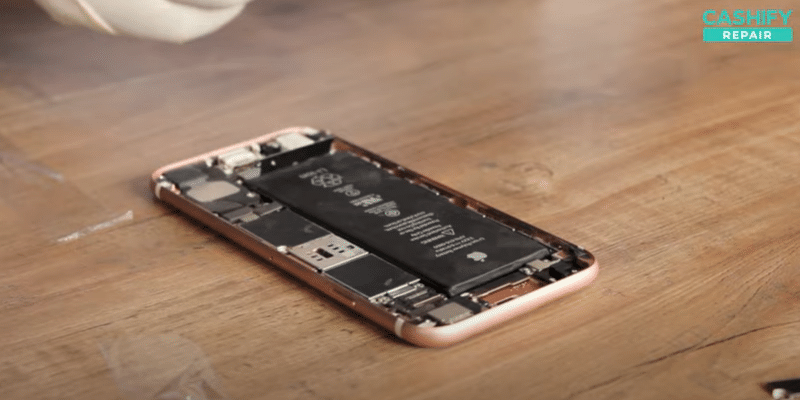
Step 4 – Removing the Battery
There are some ways to go ahead with any separation and removal. The battery is held in its place with two strips of adhesive. These types of adhesive strips are pulled out from underneath the device. If they tear, the battery will have to be levered out from the left side of the device. Doing it this method will reduce the risk of getting tearing. You can also pull the adhesive straight downwards, in the direction of the charging port, but, it tears easier that way. When the adhesive is out, you can remove the battery using fingers.
Step 5 – Connect the Battery
Put a brand new adhesive in a proper place and put the battery on it. If the new battery did not come with adhesive then the tape is fine. Take a small piece of tape and make a proper loop out of it with the sticky side out. Put the loop in that previous place where the previous adhesive was. Then press the battery down directly with your fingers. After this joint the front assembly if you disconnected it earlier.
Bingo! You just replaced your battery of iPhone 6S sitting at home. Stay tuned to Cashify and keep watching informative videos like these.