Want to allocate a disk which keeps your files separate from your operating system? Don’t worry, Windows built-in Disk Management tool has got your back. When it comes to partitioning the SSD in Windows 11, the operating system provides you with two options using which you can effortlessly divide your SSD storage and make partitions. This article goes through how the partitioning of SSD helps your OS work more efficiently; later, two methods for the same are discussed.
How partitioning SSD helps you run your computer more efficiently:
– Reduce the risk of data loss: You can reduce the amount of information lost by keeping the operating system and personal information separate, when the Windows OS fails and needs to be reinstalled, protecting the security of personnel files.
– Run different OS on the same computer: Dual Booting allows two different operating systems to run on one device. A separate partition is absolutely necessary if you wish to run Windows 10 and Windows 11 on the same computer system because each operating system needs its own system partition.
– Effectively manage your SSD: By dividing your SSD into different partitions, you may more quickly and efficiently manage the data on each one. For instance, one partition houses Windows 11’s operating system, while the other partition houses your personal files. Hence, the partition allows you to keep your data more organized and separated.
– Improved Security: Setting up the right protocols on sensitive partitions helps increase security.
Also Read: How To Add Emojis On Macbook And Windows?
How To Partition SSD In Windows 11
Here, we’ve discussed two methods to divide your existing SSD into partitions.
1) Using Disk Management &
2) Using Diskpart Command
Method 1: Using Disk Management Utility
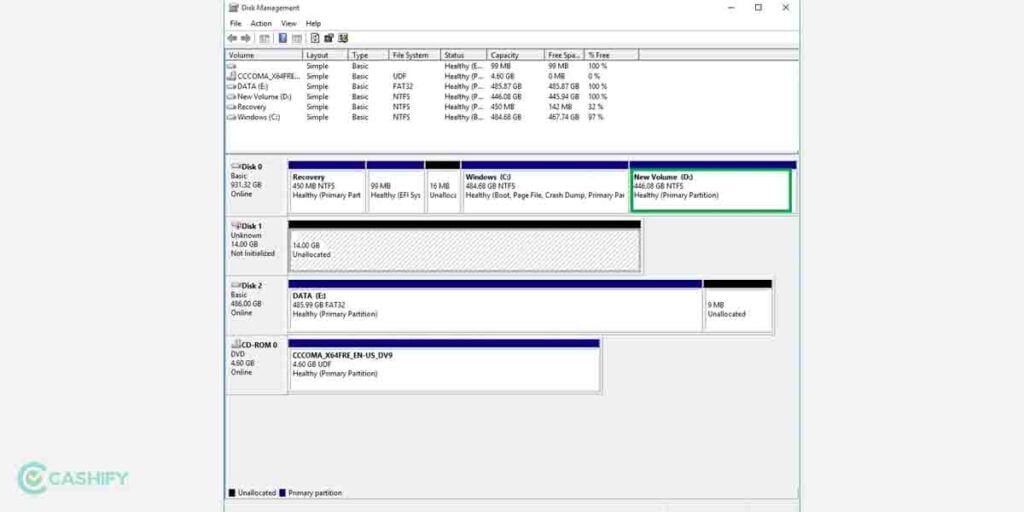
Whether you want to partition your SSD to run various OS on your PC or reduce the risk of data loss, you can perform the partition by using an internal feature of Windows 11 which is Disk Management. It helps you shrink volumes, extend or create partitions as well as allows you to format the partitions. You can perform this task by following the steps listed below:
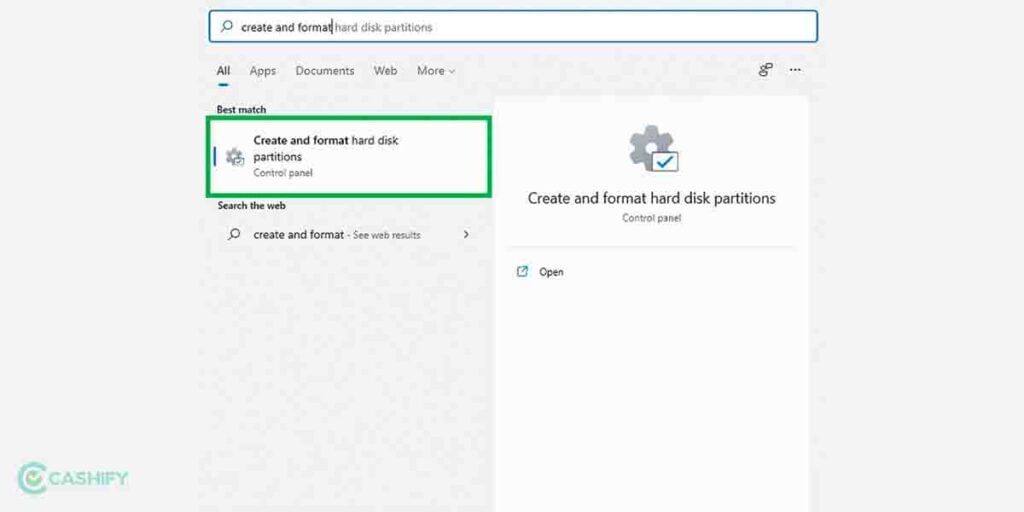
Step 1: Click the Search icon or press Windows + S on your Windows 11 desktop. Search “Create and format hard disk” and open it.
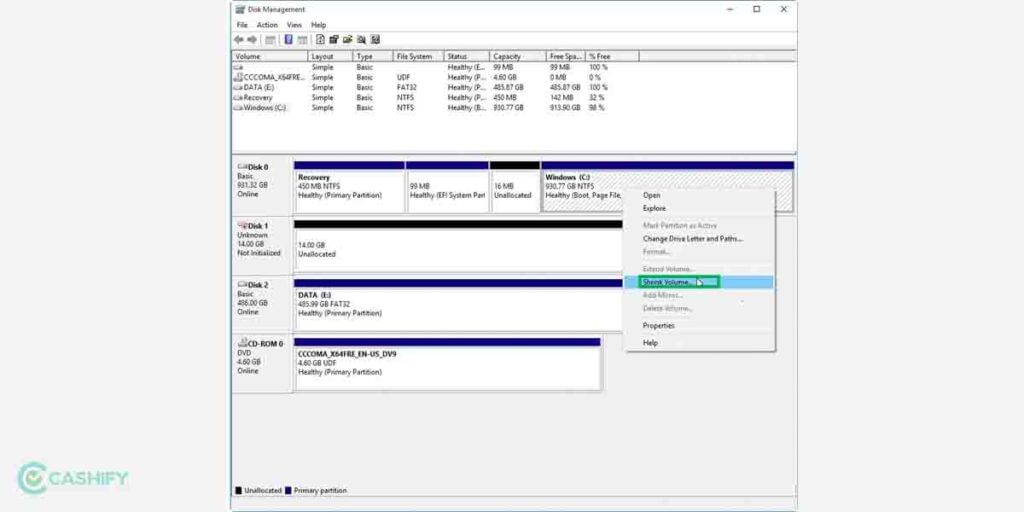
Step 2: If Windows OS takes up the entire partition then the first thing you need to do open Disk Management. Shrink Volume might help you create free space. Shrink Volume can be chosen by right-clicking the system partition.
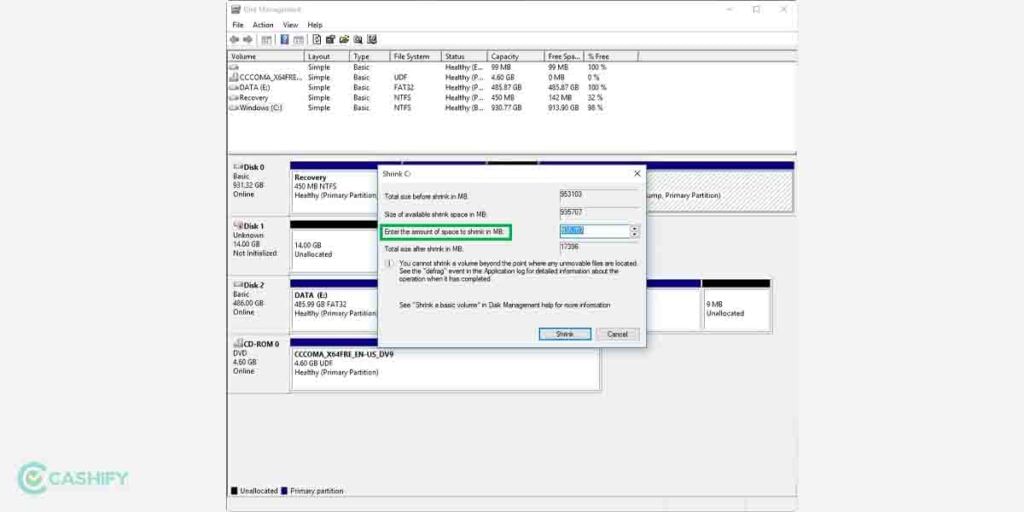
Step 3: Enter the amount of space you want to shrink in “MB” format and click on “Shrink” to proceed further.
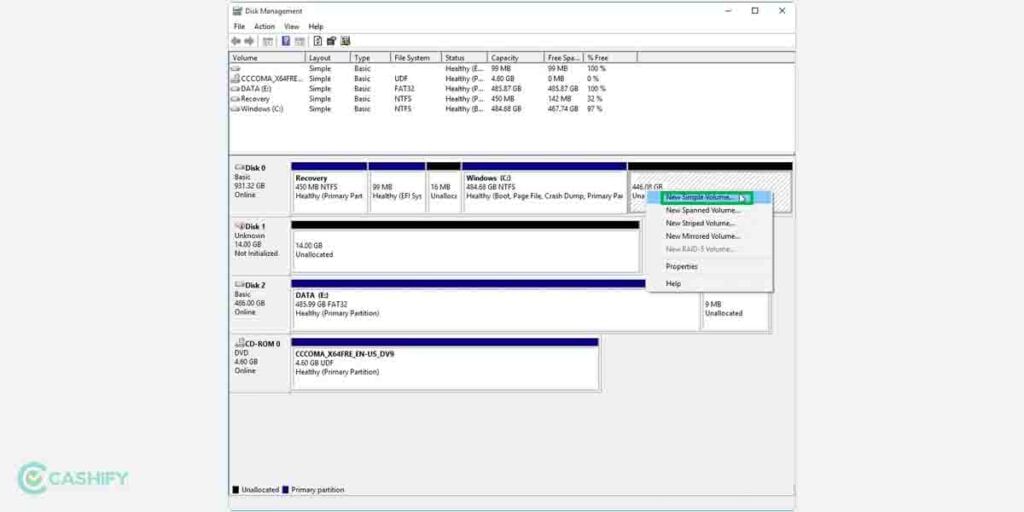
Step 4: When you perform the previous step you will notice a piece of unallocated space located on the right of the system partition. To proceed further, Right-click on the unallocated space, where you will find several options shown in the image below. Now, Click on the “New Simple Volume”.
Step 5: Enter the name, size, and file system for the new volume. Click Next and Finish.
Refrain from using up the entire amount of free space you created if you still wish to establish another partition. You can repeat the “shrink and create” process to create other partitions on the hard drive.
Also Read: Windows 11 Tips And Tricks That You Should Not Miss
Note: After following Step-1 and opening the Disk Management if you find out that your SSD already has Unallocated space, you can follow the below-listed steps to perform SSD Partition.
– Right-click on the unallocated space.
– Here, Select New simple volume.
– Enter the name, size, and file system for the new volume.
– Click on the Next and Finish.
Also Read: Windows 10 Dark Mode: How To Enable It?
Method 2: Using DiskPart Command
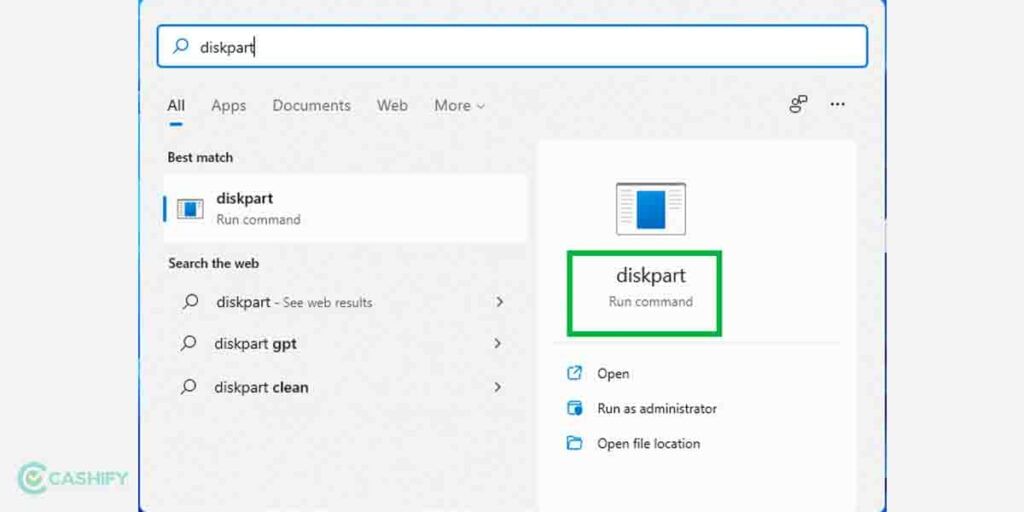
Step 1: Press Windows + S, type “diskpart“, and click the result to open it.
Step 2: To Create a New simple volume on your personal computer SSD.
Here, there are two cases:
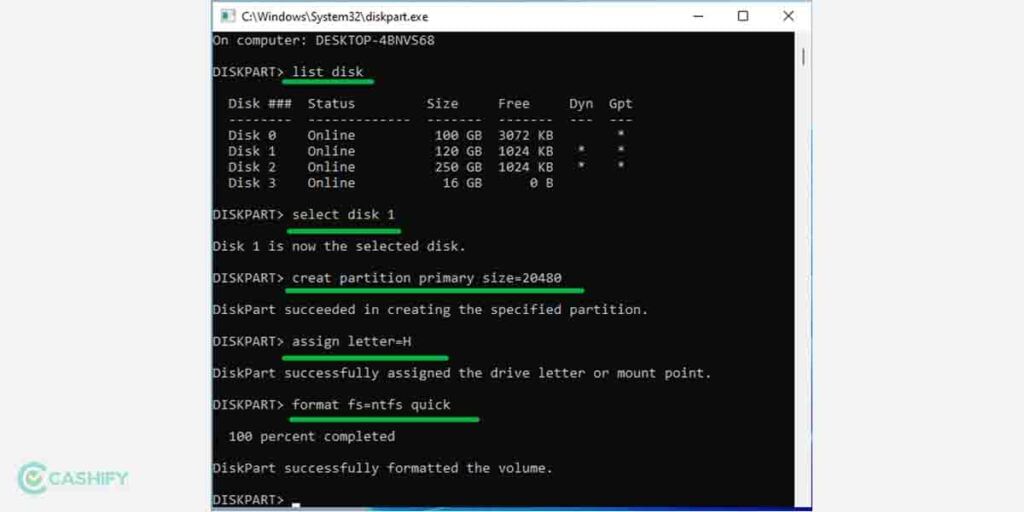
- With unallocated space
– Type “list disk” in the command prompt.
– Select the disk from which you want to make a partition by typing “select disk x”
– Enter the desired size of the partition by writing “create partition primary size=####”
– Assign a letter to the disk by typing “assign letter=P”
– At the end, type “format fs=ntfs quick”
Refer to the below image for the case of “With Unallocated Space”
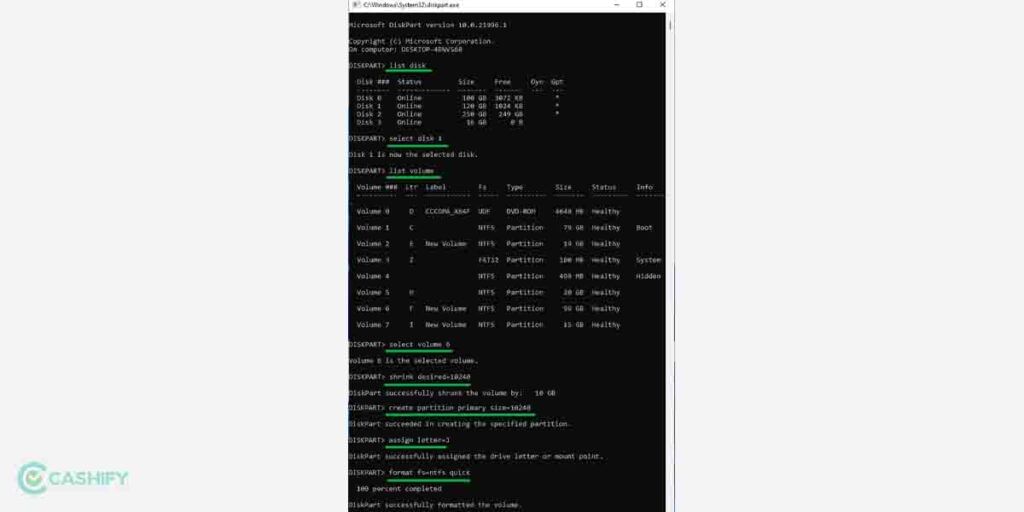
- Without unallocated space
– Type “list disk” in the command prompt.
– Select the disk from which you want to make a partition by typing “select disk x”
– Type “list volume” to get info about all the volumes.
– Select any volume by typing “select volume x”
– Shrink its size by typing “shrink=###”
– Enter the desired size of the partition by writing “create partition primary size=####”
– Assign a letter to the disk by typing “assign letter=P”
– At the end, type “format fs=ntfs quick”
Refer to the below image for the case of “Without Unallocated Space”
Step 3: Type Exit to close the command prompt windows once the disk partition operation is completed.
Two of the best ways are offered in the article above. You can try using the DiskPart command to break an existing partition into two partitions at once, or you can use Disk Management to reduce the disc before creating partitions. If you have such a need, I think this would be your best option.
A few tips regarding this process:
- It is advisable to reserve 100GB or 120GB of space for the system partition while downsizing it. Because Windows 11 may not run at its optimum if the system partition does not have adequate space.
- Disk Management only supports volumes that are shrinking in NTFS and RAW. If the partition is on FAT32, you will need to find an alternative solution.
Wrapping Up:
So, this wraps up our guide on partitioning the SSD on Windows 11. Although the process seems a bit tricky, it isn’t in reality. Just follow through the steps mentioned and you’ll be good to go.
Also Read: How To Update Graphics Driver In Windows 11?