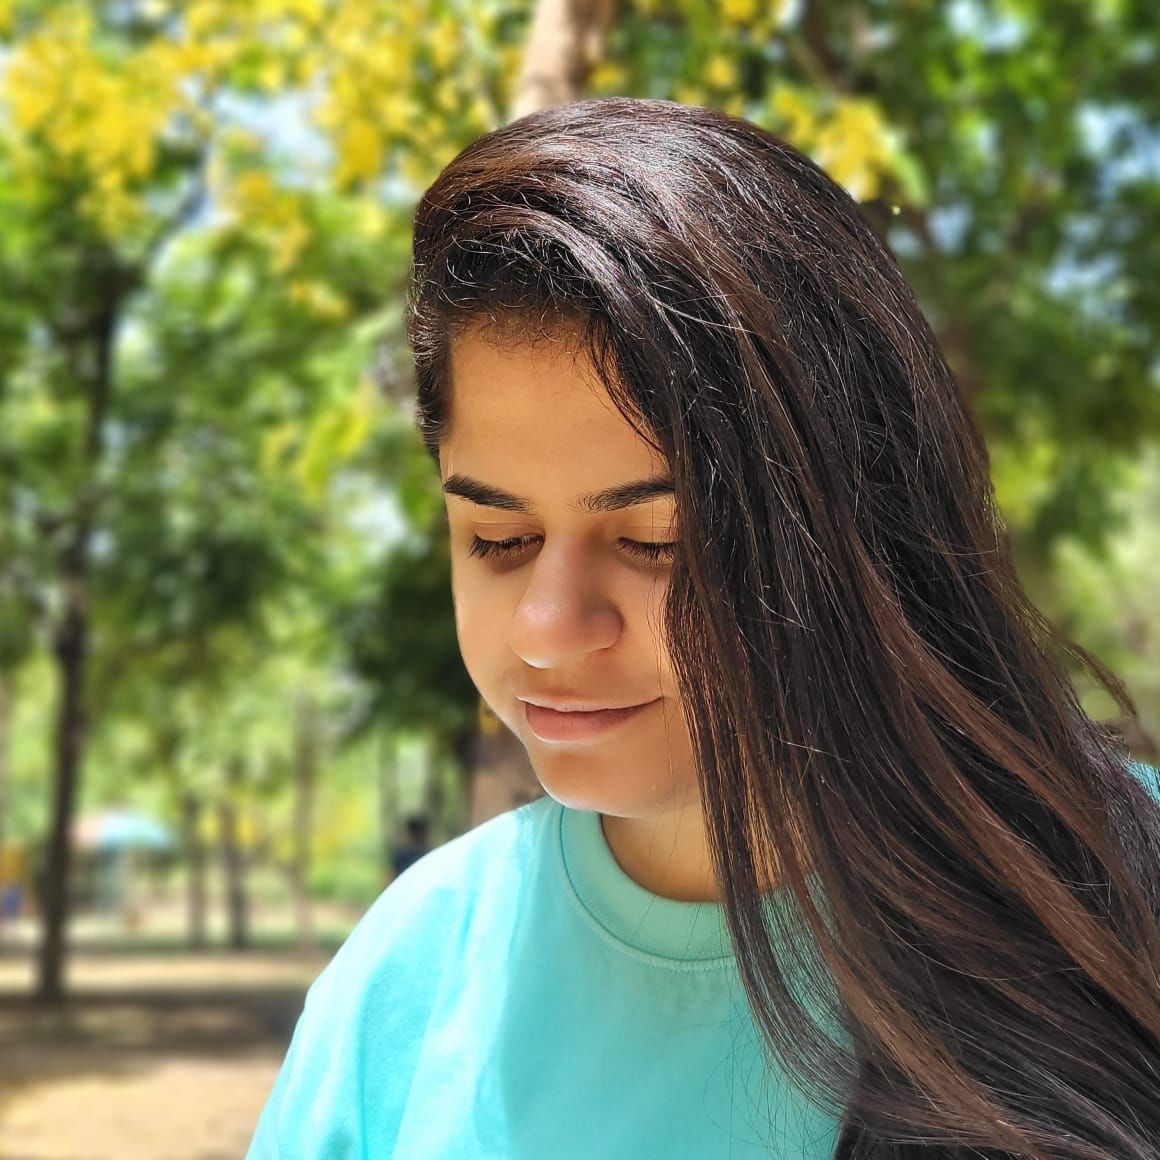


We all love that effect where the person looks sharp and everything behind has a soft blue effect! You can get blurry background on DSLR too. You don’t even need a complicated setup or years of photography experience.
The biggest mistake beginners make is thinking the camera itself creates the blur. It doesn’t. Your lens choice, aperture, distance from your subject, and distance between your subject and the background all work together to create it.
Once you understand those four things, getting a blurry background becomes much easier. Let’s start from the simplest setup.
What Creates A Blurry Background?
The technical term for the blurry background effect is bokeh. You’re creating a shallow depth of field. This is where a small area of the photo appears sharp while areas in front of or behind that focus point become soft.
There are four things you should pay attention to:
- Use a wide aperture, such as f/1.8 or f/2.8.
- Get Blurry Background on DSLR by being relatively close to your subject.
- Keep plenty of space between your subject and the background.
- Use a longer focal length when your lens allows it.
Also Read: Best DSLR Camera Under 30000: 5 Reliable Picks for Beginners!
Step 1: Set Your Camera To Aperture Priority
If you’re new, Aperture Priority mode is probably the easiest place to start. On Nikon cameras, you’ll usually see A on the mode dial. On Canon cameras, it’s generally Av.
This mode lets you choose the aperture while the camera takes care of the shutter speed. Set your aperture to the lowest f-number your lens allows.
For example:
- f/1.8
- f/2
- f/2.8
- f/3.5
The lower the number, the wider the aperture.
Why does a smaller f-number create more blur?
Think of the aperture as the opening inside your lens.
At f/1.8, the opening is wide. At f/8, it’s much smaller.
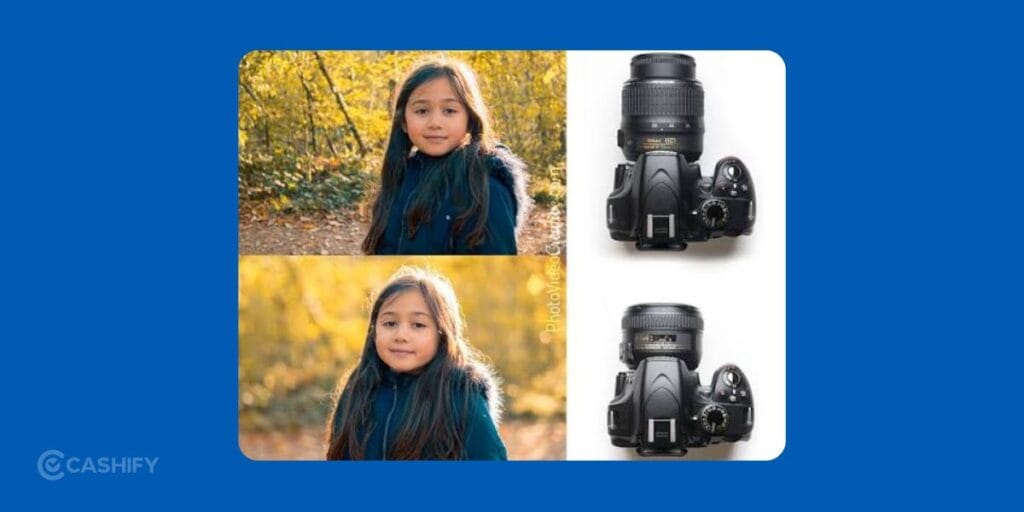
A wide aperture creates a shallower zone of acceptable focus. That’s what helps separate your subject from the background. So if you’re currently shooting at f/8, try f/2.8 or lower if your lens allows it.
Step 2: Use The Lowest Aperture Your Lens Allows
Your lens determines how wide you can open the aperture. For example, a typical 18-55mm kit lens might have a maximum aperture around f/3.5 at the wide end and f/5.6 at the telephoto end.
A 50mm f/1.8 prime lens can open all the way to f/1.8.
If your goal is a strongly blurred background, an f/1.8 lens can give you a much easier path than a basic kit lens. You can still create background blur using an 18-55mm lens. You simply need to use distance and focal length intelligently.
Step 3: Move Closer To Your Subject
If you’re standing several meters away from your subject and taking a full-body photo, the background may not blur as strongly. You need to walk closer and frame your subject more tightly.
This is particularly useful for portraits.
For example, instead of standing far away and photographing a person from head to toe, try moving closer for a waist-up or head-and-shoulders portrait.
You’ll usually notice a much stronger separation from the background.
Also Read: Refurbished DSLR Vs New DSLR: Which Is The Better Deal?
Step 4: Push The Background Far Away
Imagine you’re photographing someone standing directly against a wall. You can shoot at a wide aperture, but the wall may still remain fairly recognisable.
Now ask the person to move several feet away from that wall. Suddenly, the background has a much better chance of becoming soft and indistinct.
The basic idea is simple:
Subject close to camera + background far from subject = stronger background blur.
You don’t need to measure the distance perfectly. Just look for separation. A person standing two feet in front of a wall is much harder to isolate than someone standing several meters away from it.
Step 5: Try The Long End Of Your Zoom Lens
If you have an 18-55mm lens, don’t automatically shoot at 18mm. Try 55mm.
A longer focal length can help create stronger background separation. It is particularly true when you position yourself appropriately. This is one reason photographers often like focal lengths around 50mm, 85mm, or longer.
There’s an important catch, though.
You may need to step farther back to fit your subject into the frame when using a longer focal length. Don’t assume that simply zooming in guarantees beautiful bokeh. Your subject-to-background distance still matters.
The Simple Bokeh Formula You Need To Know!

If you remember only one thing from this guide, remember this:
Wide aperture + close subject + distant background = blurry background.
Then add a longer focal length when it suits the shot.
That’s the basic recipe. For a quick portrait test, try:
- Mode: Aperture Priority
- Aperture: f/1.8 to f/2.8 if available
- ISO: Auto is fine for beginners
- Focal length: Around 50mm or longer
- Subject: Relatively close to you
- Background: As far behind the subject as practical
- Focus: The subject’s nearest eye for a portrait
Try change only one thing at a time so you can see what actually changes the result. This way, you will learn better.
Do You Need A Special Lens For Bokeh?
No.
But a suitable lens can make the job much easier. Your standard kit lens can create background blur. The limitation is its maximum aperture.
If you’re serious about portraits, I’d seriously consider an inexpensive prime lens. Otherwise, the basic kit is also good to go.
A 50mm f/1.8 is one of the best places to start for many DSLR owners. It’s relatively affordable, compact, and capable of a much wider aperture than many basic kit lenses.
For a crop-sensor DSLR, a 35mm f/1.8 can also be a very useful choice. It gives you a wider field of view. This can work well for portraits, everyday photography, and indoor shooting. An 85mm f/1.8 is another excellent portrait option if you have enough space to work.
Also Read: All Details About Refurbished Nikon DSLR Cameras: Best Picks, Where To Buy!
50mm Vs 85mm For Portraits
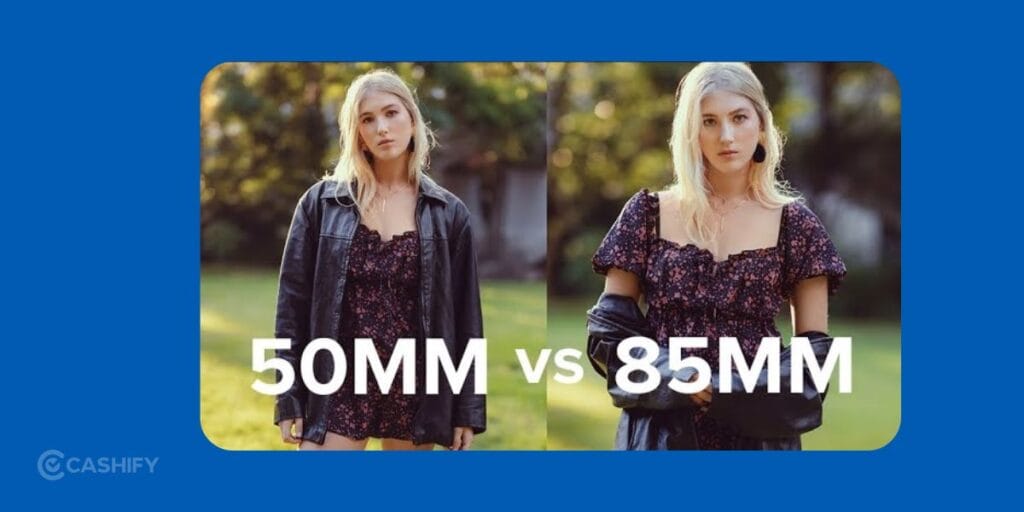
A 50mm lens is usually easier to use in smaller rooms and tighter spaces.
An 85mm lens gives you a narrower view and can create a very pleasing portrait perspective. But you will need more room between yourself and your subject.
If you’re buying your first affordable bokeh lens, I’d recommend 50mm f/1.8 for full-frame cameras. For many crop-sensor cameras, a 35mm f/1.8 is an excellent starting point. Don’t buy an expensive lens just because you saw a photograph online that had beautiful blur. Learn to control distance and aperture first.
What If You Only Have An 18-55mm Kit Lens?
Don’t rush out to buy another lens. You can practice right now.
Set your lens near 55mm. Open the aperture as wide as possible. Move close to your subject and ask them to move far away from the background.
Then take a photo.
For example, place your subject several feet in front of a tree, fence, or building. Position yourself relatively close. Zoom toward 55mm and use the widest aperture available at that focal length.
You may be surprised by how much blur you can get from a basic kit lens. The result won’t necessarily look like a 50mm f/1.8 shot at f/1.8, but the technique still works.
How To Get Those Beautiful Bokeh Circles?
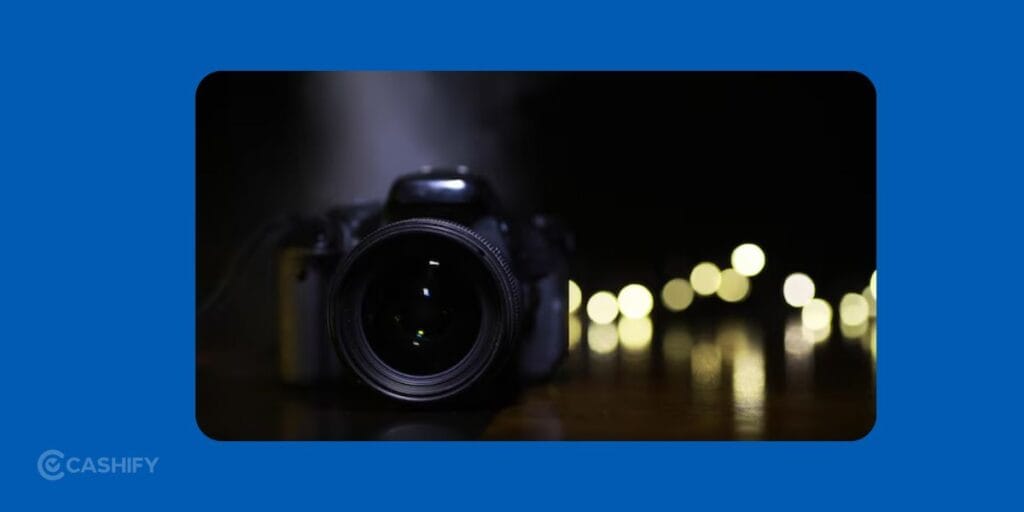
A blurry background isn’t automatically beautiful bokeh.
If you want those recognisable glowing circles in the background, you need small bright points of light or highlights behind your subject. You can try:
- Fairy lights
- Street lights
- Sunlight passing through leaves
- Reflections
- Small lamps
- Bright windows in the distance
Put those lights far behind your subject and shoot at a wide aperture. After this, your camera can turn them into soft circles or other blurred shapes. This is where bokeh can become much more visually interesting.
Don’t Focus On The Background
This sounds obvious, but it’s an easy mistake to make. If you’re photographing a person, focus on the person.
For portraits, the nearest eye is usually the best focus point. A wide aperture can produce a very thin area of sharp focus. If you focus slightly behind the eye, the eye may become soft even though the background looks fantastic.
Sharp subject first. Beautiful blur second.
Also Read: Top Options For Refurbished Canon DSLR Cameras: Are They Worth It?
Why Is My Background Still Sharp?
If your background isn’t blurry enough, don’t immediately blame your camera.
Check these things first.
| Problem | What to try |
|---|---|
| Your aperture isn’t wide enough | If you’re shooting at f/8, try f/4, f/2.8, or f/1.8 if your lens allows it. |
| Your subject is too close to the background | Move your subject farther away from the wall, trees, furniture, or other objects behind them. |
| You’re standing too far from your subject | Move closer and create a tighter composition. |
| You’re using a very wide focal length | Try zooming toward the longer end of your lens. |
| Your lens has a narrow maximum aperture | Consider using a fast prime lens, which can provide a wider maximum aperture. |
Don’t change everything at once. Test one adjustment at a time.
Don’t Always Shoot At f/1.8
This might sound strange after everything we’ve discussed, but the lowest possible aperture isn’t always the best choice.
At f/1.8, your depth of field can become extremely shallow.
For a head-and-shoulders portrait, one eye might be sharp while the other becomes noticeably softer if the subject’s face isn’t parallel to the camera.
Try f/2.2, f/2.8, or f/3.2 when you need a little more of the subject to stay sharp. You can still get plenty of background blur. The goal isn’t simply maximum blur.
The goal is enough blur to separate the subject while keeping the important parts of the subject sharp.
Full-Frame Vs Crop-Sensor DSLR

You don’t need a full-frame DSLR to get bokeh. A crop-sensor camera can produce excellent background blur.
Sensor size does affect how you can achieve certain depth-of-field results at the same framing and aperture. But don’t let that become an excuse for poor technique. A crop-sensor DSLR paired with an affordable 35mm f/1.8 or 50mm f/1.8 lens can produce fantastic portraits.
Common Bokeh Mistakes To Avoid
Putting the subject against a wall
This is probably the biggest beginner mistake. Give the background some distance.
Shooting everything at f/1.8
A wide aperture isn’t a magic setting. Use it when you actually need a very shallow depth of field.
Ignoring the background itself
Blur doesn’t automatically turn an ugly background into a good one. Pay attention to colors, bright spots, poles, branches, signs, and other distracting shapes.
Forgetting shutter speed
A wide aperture lets in lots of light. In bright daylight, your camera may need a very fast shutter speed.
In darker conditions, your shutter speed may fall too low and cause camera shake or subject movement.
Getting distracted by the bokeh
It’s easy to become obsessed with huge blurry circles.
Don’t let the effect become more important than the photograph.
The background should support your subject, not compete for attention.
A 30-Second Bokeh Test You Can Do Today
Grab your DSLR and find a person, a plant, or even an object on a table.
Now do this:
1. Set Aperture Priority.
Choose A or Av.
2. Use your widest aperture.
Try f/1.8, f/2.8, or the lowest number available.
3. Put your subject close to you.
Fill a good part of the frame.
4. Move the subject away from the background.
A few meters can make a noticeable difference.
5. Zoom in if you have a zoom lens.
Try the longer end.
6. Focus carefully.
For a portrait, focus on the nearest eye.
7. Take the shot.
Then change the aperture to f/4 and take another.
Now compare the two images.
You’ll immediately start to see how aperture changes the amount of background blur.
Also Read: Refurbished Canon EOS 1300D: Capture Stunning 18MP Shots Without Overspending
Final Thoughts
In the end, I can say that you don’t need a new camera. You can simply start by changing your positioning.
Put your subject closer to you. Push the background farther away. Open the aperture. Zoom in when appropriate. Then take a few test shots.
Those simple changes can transform the result. Once you understand how aperture and distance work together, you’ll be able to create the soft background you want. You can also check out refurbished camera lenses to save money on best zoom lenses!
Share this guide with your other DSLR buddies as well.
If you’ve just bought a new phone and don’t know what to do with your old phone, then here’s your answer. Sell old mobile to Cashify and get the best price for it. If you are planning to buy a new phone, check out Cashify’s refurbished mobile phones. You can get your favourite phone at almost half price with six-month warranty, 15 days refund and free delivery.