In recent years, Linux has become a popular operating system for various devices, from servers and desktops to mobile phones. While Android is already a Linux-based operating system, some advanced users still prefer to install a different Linux distribution on their Android devices.
You might also want to do so for several reasons, ranging from the ability to run Linux-based applications to simply getting a desktop environment. In this article, we will explore the various ways through which you can install the Linux operating system on an Android device (with and without root) using different tools and methods.
Also Read: Ubuntu Vs Windows: Which Is Better In The Long Run?
How to run Linux on Android?
1. Setup Linux on Android Without Root:
1.1 Install Linux on Android Using Andronix and Termux
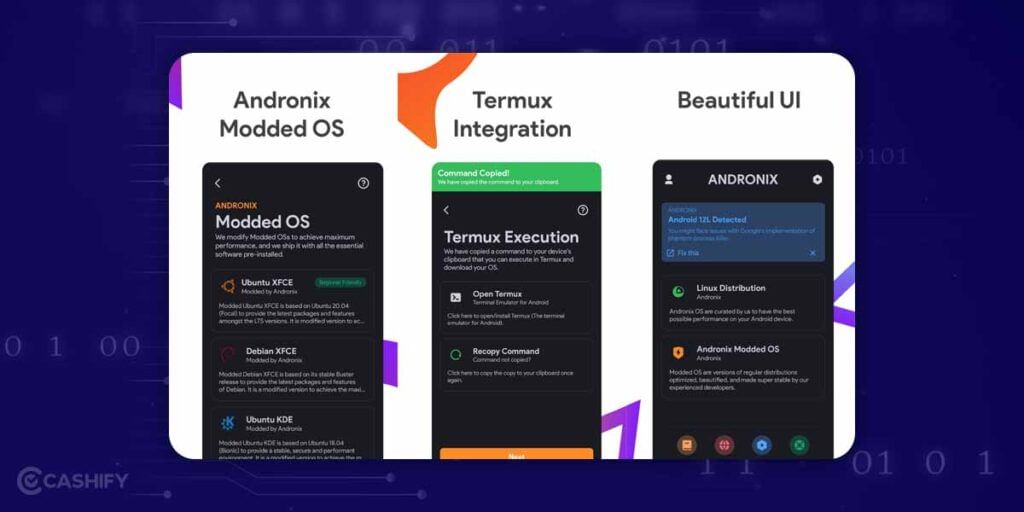
If you are an Android user and want to run Linux on your device, one of the easiest ways to do so is with the help of Andronix. Andronix is a tool that allows you to run a Linux distribution on your Android device without rooting it. Here is a guide on how you can set up Linux on your Android device without rooting it
You’ll also require an application named Termux, which unfortunately isn’t available on the PlayStore. You can head to the F-Droid Store though. Download F-Droid Store and install Termux with its help. Termux is a terminal emulator that lets you use Linux command line software on your phone. However, it is important to note that running Linux on your Android device may affect its performance and battery life, so use it with caution.
Step 1: First, download the following tools:
Andronix app: Google Play Store Link
VNC Viewer: Google Play Store Link
Termux from F-Droid Store: Download Link
Step 2: Choose a Linux Distribution
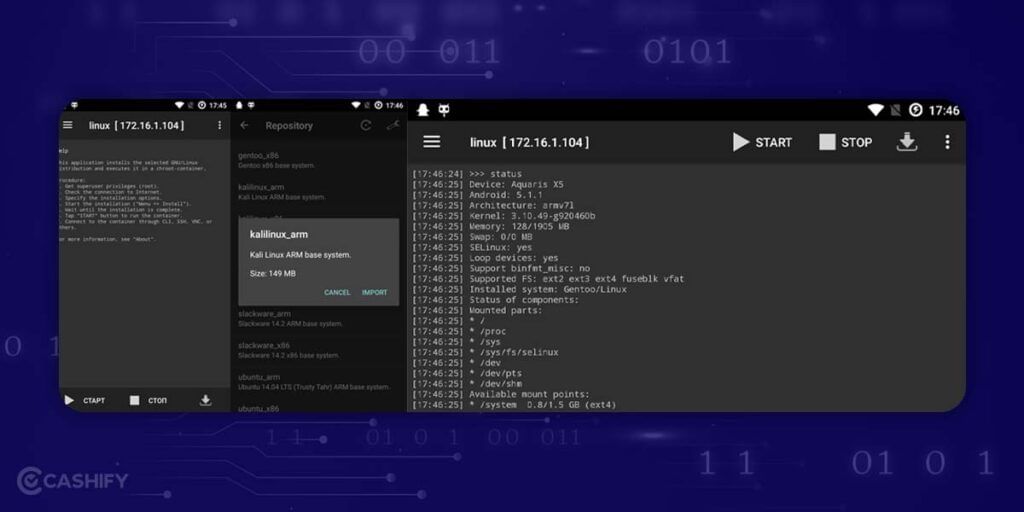
Now open Termux and wait for the setup to complete. And now open Andronix and look for modded and unmodded Linux distribution system.
Some of the popular ones are Ubuntu, Fedora, Manjaro, Arch, and Debian. Alpine is also some of the in-demand ones, but it’s tricky to use. If you’re new to Linux, I’d suggest going with Ubuntu.
The Modded OS is the one optimized for Android OS. Select Ubuntu from the list and select the latest version. Click on the “Install” button and you’ll be asked to choose a version, either 18.04 or 20.04. 18.04 came out in 2018, and Ubuntu 22.10 is the latest available version. Once you pick the version, Andronix will copy the commands you’ll require to install the distribution.
Step 3: Now select ‘Window Manager’ under GUI selection and ‘XFCE’ under the desktop environment.
Step 4: Now a batch script will be coped in the clipboard. Open up Termux on your phone and hold down the screen to paste in the text.
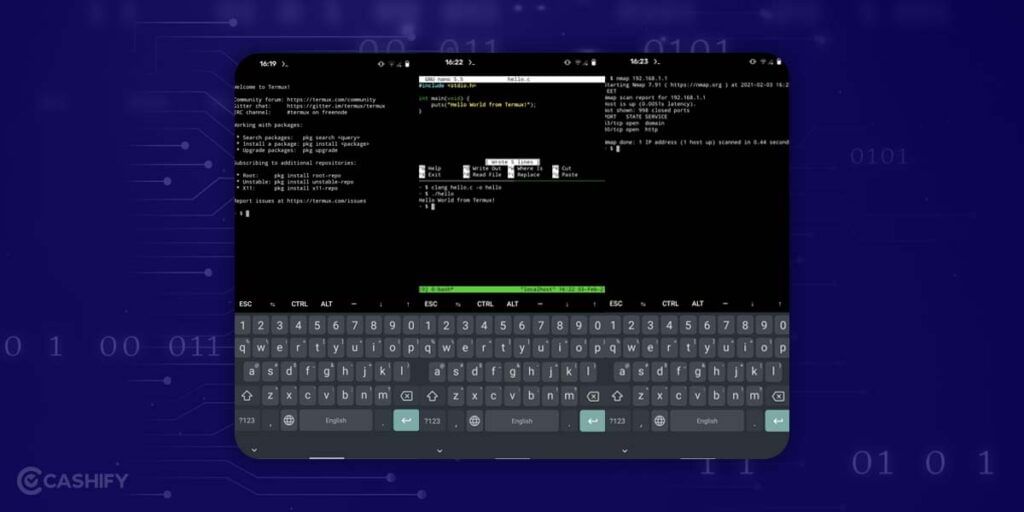
Step 5: Now, hit Enter on your keyboard and it will start downloading Linux. Let the installation process do its thing.
It’ll download a bunch of scripts and packages and get your operating system up and running on your phone. Just make sure you’ve got a good internet connection and some storage space available since it might download quite a bit of data depending on the platform you choose.
(Note: You’ll see a lot of text scrolling by, but don’t worry – you’ll only need to confirm a few commands by hitting Enter. The installation might take a bit of time, like installing any other operating system on a computer, so just sit tight and let it do its thing.)
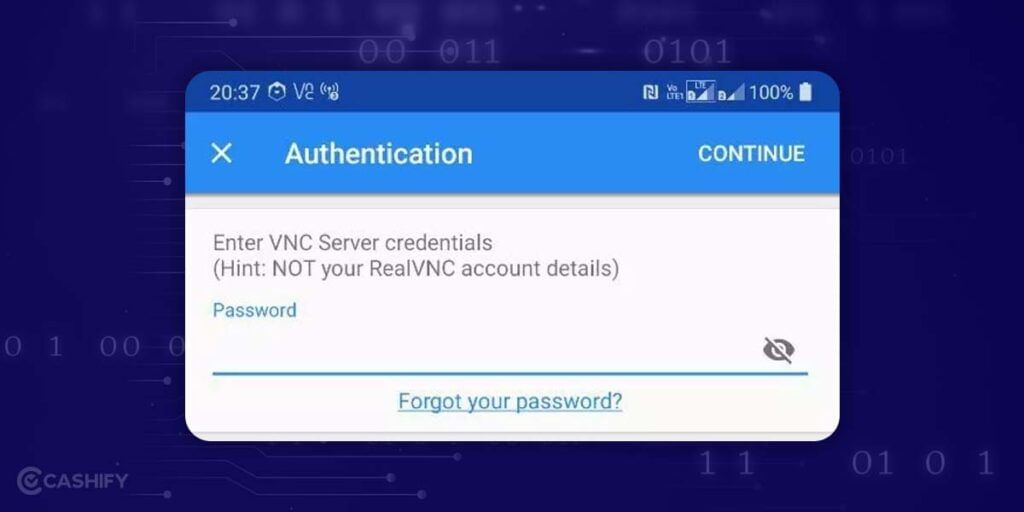
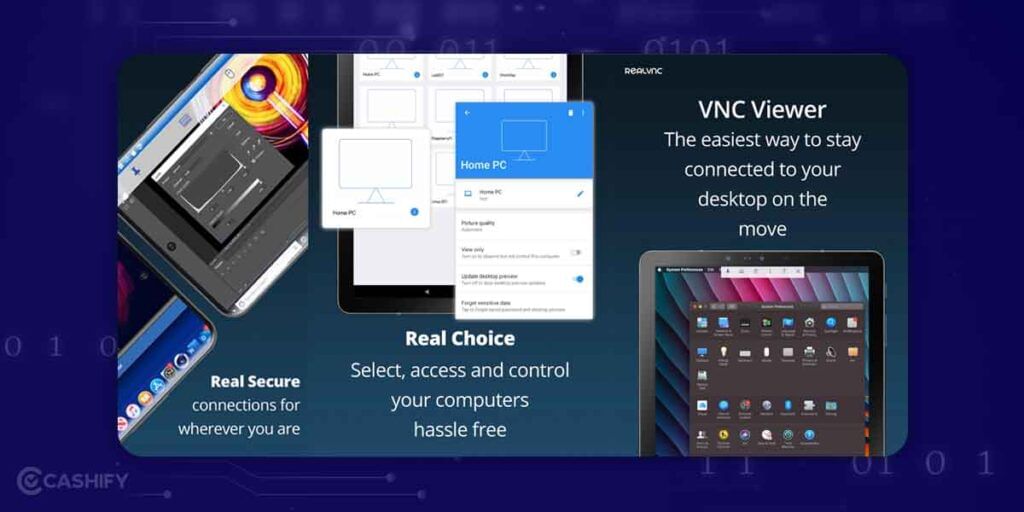
Step 6: When you’re installing this thing, there’ll be a point where you’ll have to pick the resolution for the VNC server. This VNC server lets you access your computer from far away. Since Linux is running on Termux, you need a VNC client to get to the graphical interface.
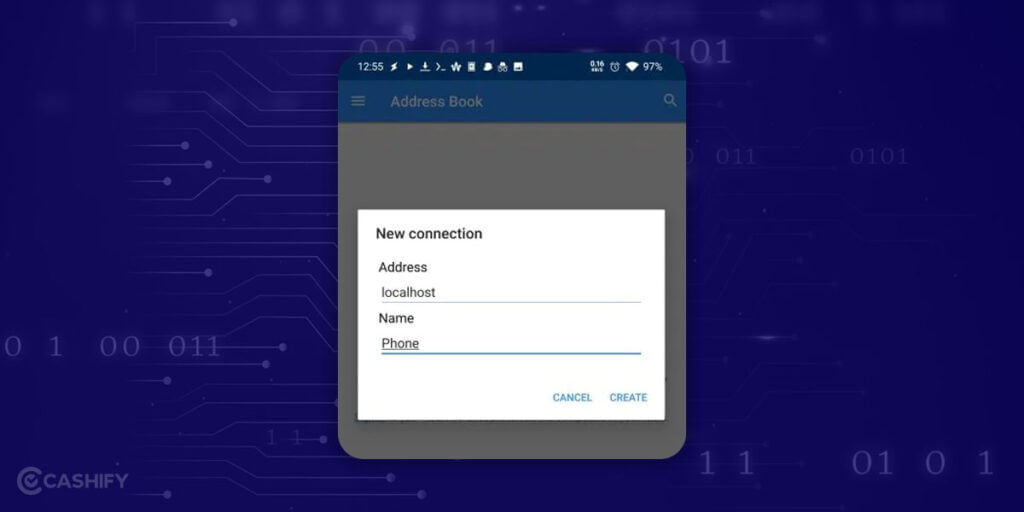
Go ahead and open ‘VNC Viewer’ app. And select the ‘Plus’ button on the bottom right. Now add the server address and name it as you like. Now click on ‘create’ to set up VNC server. Enter the password that you set up while installing and you are good to go.
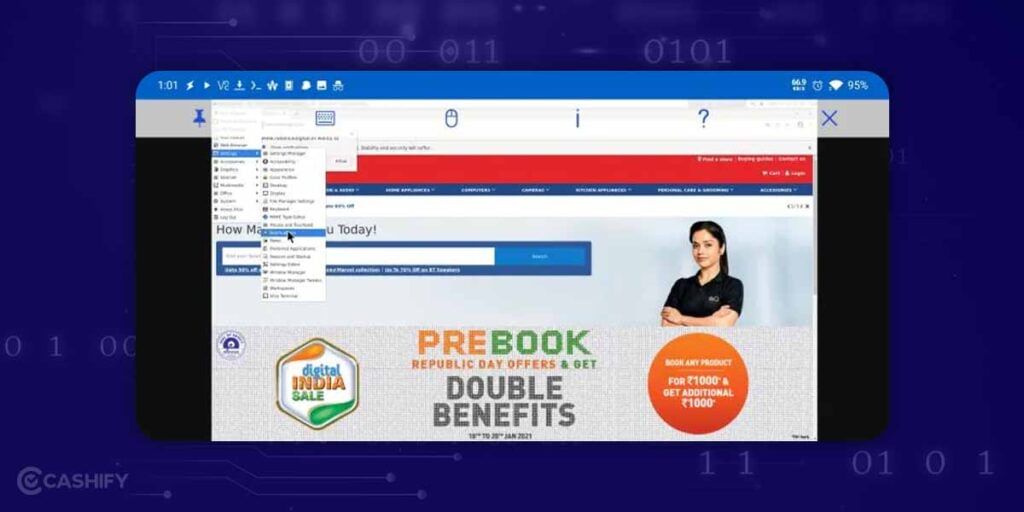
Step 8: You can now use Linux on your smartphone, just like you would on a laptop or desktop. You can find an app store on the Linux distribution, and even install additional software, or open the terminal on the Linux distribution to install more packages. You can now store data, and run programs that normally wouldn’t run on your Android smartphone.
When you’re done using the Linux distribution, you need to shut it down just like you would on a laptop or PC. You can also force it to turn off by closing the Termux app, but that’s not recommended.
Also Read: How To Give Windows 10 A Makeover To Look Like Windows 11
1.2 Install Linux on Android Using UserLAnd
If you’re not happy with Andronix and Termux method or you’re just looking to try out a different flavor of Linux, there’s another option you might want to check out: UserLAnd. This app lets you install all sorts of Linux distros on your Android device, from Arch and Kali to Ubuntu and Alpine. And if you don’t want to deal with a full desktop environment, you can even launch individual apps like Gimp and LibreOffice.
So, if you are interested in installing Ubuntu on your Android device. Here’s how you can do it in a few easy steps:
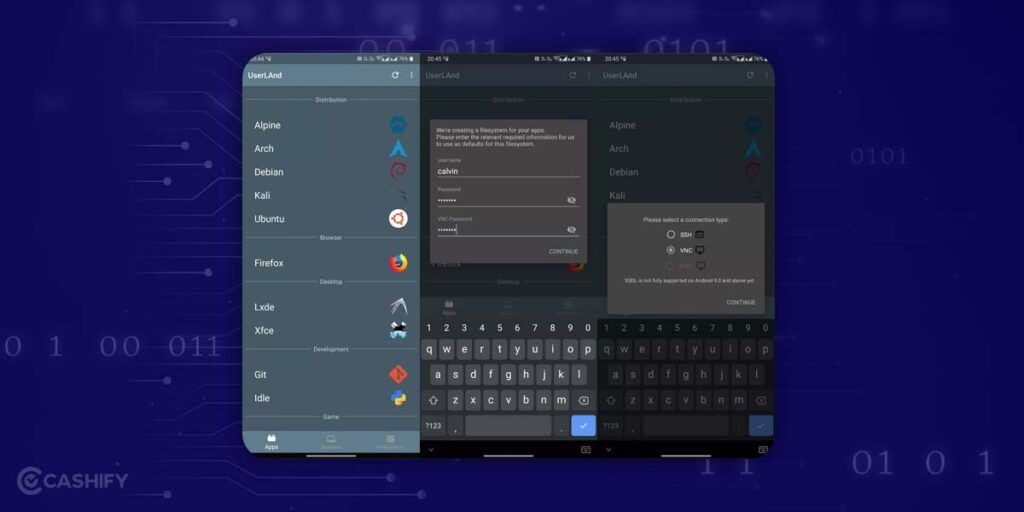
1. Get the UserLAnd app from the Play Store and install it.
2. Open the app and pick the Linux distribution you want to install (we’ll go with Ubuntu for this example).
3. Type in a username, password, and VNC password of your choice when prompted. Don’t forget these details, or you’ll have to start over!
4. The app will ask you whether you want to use an SSH or VNC connection. Choose VNC if you want a graphical user interface, and wait for the download to finish.
5. Voila! You should now see a login screen. Just type in your VNC password, and you’re good to go.
If you want to access your Ubuntu installation from another device on the same network, you can set up a VNC connection. First, find out your Android device’s IP address (either from your router or using an app like Fing). Then, add “:51” to the end of the address (for example, 192.168.0.101:51) and connect to it using a VNC app like TightVNC on your other device. Easy peasy!
Also Read: Best Gaming Laptops Under 30000
2. Setup Linux on Android Using Root:
Running Linux on an Android device has become increasingly popular among tech enthusiasts and developers alike. With a rooted Android device, it’s possible to install and run Linux distributions like Ubuntu, Debian, Arch, and more.
Here’s a step-by-step guide on how to run Linux on a rooted Android device:
Step 1: Root Your Android Device
Before you can install Linux on your Android device, you need to root it first. Rooting an Android device involves gaining administrative privileges that allow you to modify the device’s system files. The process of rooting an Android device can vary depending on the device and the version of Android that it’s running.
Step 2: Install a Linux Installer App
Once your Android device is rooted, you can download and install a Linux installer app from the Google Play Store. There are several apps available, including Linux Deploy, UserLAnd, and AnLinux.
Choose one of these apps and install it on your Android device. Download these apps and install the required files and packages to run a Linux distribution.
Step 3: Configure the Linux Installer App
After you’ve installed the Linux installer app, you need to configure it to download and install a Linux distribution on your Android device. Depending on the app you’re using, the configuration process may differ. Generally, you’ll need to select the Linux distribution you want to install, choose the installation path, and specify other installation options.
Step 4: Install and Run the Linux Distribution
Once you’ve configured the Linux installer app, you can install and run the Linux distribution on your Android device. This may take some time, as the app will download and install all the necessary packages and dependencies. Once the installation is complete, you can launch the Linux distribution from the Linux installer app.
Step 5: Access the Linux Environment
To access the Linux environment, you can use a VNC viewer app or connect via SSH. A VNC viewer the app allows you to connect to the Linux environment and interact with it using a graphical user interface. Alternatively, you can connect via SSH, which provides a command-line interface for interacting with the Linux environment.
So, now that you’ve got Linux up and running on your Android phone, you might be curious about what you can actually do with it. Well, let’s start with what you can’t do: you’re limited to programs that are designed for ARM processors. That means no Steam, unfortunately, since it only supports the x86 architecture. But don’t worry, most of the productivity programs you’d need like Firefox and LibreOffice have ARM versions available these days.
Now, if you want to install Linux apps on your Android device, here’s what you need to do:
1. Log into your Ubuntu session using one of the methods mentioned earlier.
2. Open up a terminal window.
3. Type in the following commands one by one: “sudo apt update” and “sudo apt install firefox-esr”.
4. You can replace “firefox-esr” in that command with any other program you’d like to install – for example, VLC or LibreOffice.
5. Once the program is installed, you can launch it from the Applications menu.
Just keep in mind that there are a few other limitations you should be aware of. You won’t be able to access low-level hardware functions like Wi-Fi or Bluetooth from within Linux, since those are still controlled by Android. And don’t expect hardware acceleration or complex 3D graphics to work at full speed either. Remember, you’re not running full-fledged Linux here, just a compatibility layer on top of Android.
Wrapping Up:
In conclusion, running Linux on Android is a great way to turn your mobile device into a powerful tool for development and other tasks. Following the above steps, you can easily set up a Linux environment on your Android device and start using it immediately. However, it is important to note that rooting your device can be risky and may void your warranty, so proceed with caution.
Also Read: Windows 11 Tips And Tricks That You Should Not Miss