Amazon Fire Tablet with stock Android? No, you do not have any sort of Google Services installed in them like your Gmail, YouTube, Maps, Files, etc. in an Amazon Fire Tablet, which will make it a stock Android. You need to install Google Play Store on the Fire Tablet to get all these applications.
The way to the whole installation of Google services to make the Fire Table look like a standardized Android Tablet is a bit comprehensive but easy to understand process which we will be discussing in this article. Some options are present in Fire O.S., while others demand Android Debug Bridge (ADB)commands or committed apps.
Also Read: How to Uninstall Microsoft Edge
1) Changing the Home screen launcher with ADB Commands
Amazon’s User Interface is not immersive to look at, and it also does not support shortcuts, gimmicks and other cutting-edge elements to make the Amazon Fire Tablet look like stock Android. You always have the option to change it using the ADB Command setup wherein you connect your Fire Tablet to a P.C. and use ADB Command to make the change which is a bit long process but worth the effort. You always run the risk of being reverted back to the factory settings launcher later on since this is an uncorroborated hack setup.
Also Read: Learn 3 Different Ways To Download YouTube Videos On Mac
In this article, we will show you the example of using the Lawnchair 2 as the alternate User Interface launcher because it deems extremely identical to the main menu layout on most of Google’s Pixel-based gadgets and will make your Amazon Fire Tablet have that stock Android look to it.
Once you install Lawnchair2, you will se it as an app on the main menu. The next step would be to install the Android Debug Bridge (ADB) command centre on your P.C. so that we can execute commands on the Fire Tablet to make Lawnchair the default launcher.
Also Read: How To Make UPI Payment Via A Feature Phone?
15 Second ADB Installer is the most effortless choice on Windows, and for macOS-based, Linux-based or ChromeO.S-based P.C, you can use the Nexus Tools.
After you have downloaded and installed the ADB, you have to allow USB debugging on your Fire Tablet.
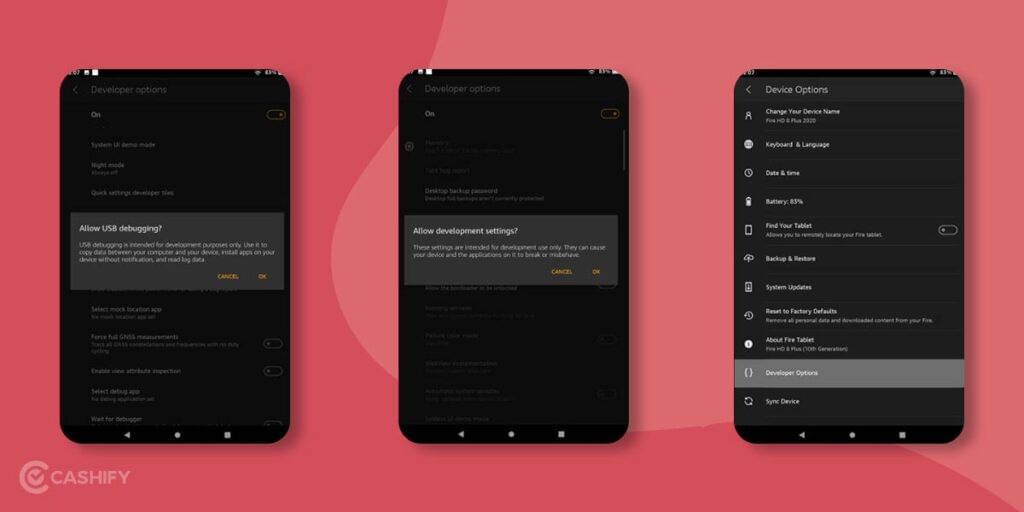
- Navigate to the Settings app on your Fire Tablet, go to Device Options > About Fire Tablet, and keep clicking on the Device’s Serial Number till the time ‘You are a developer’ popup comes to an end.
- Now again, go to the ‘Device Options’ and choose the new ‘Developer Options’ menu, and toggle the large button at the top to ‘ON’. Ultimately, go down to the Debugging section, and toggle the ‘USB debugging’ to ‘ON’.
Now you can operate Android Debug Bridge(ADB) with your Amazon Fire tablet. Connect it to your P.C. with a USB cable.
On your P.C., go and open up the Terminal (for macOS and Linux-based P.C.) or open up the Command Line (for Windows-based P.C) application. Windows users, type “cmd” (without the quotes) into the Start Menu should bring it up. In the window, punch in ‘adb devices’ (without the quotes) and hit Enter.
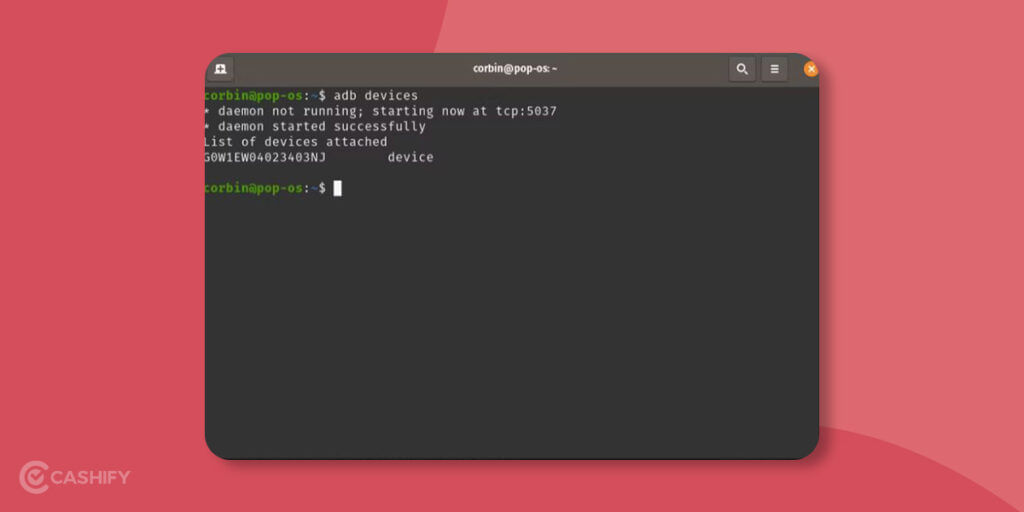
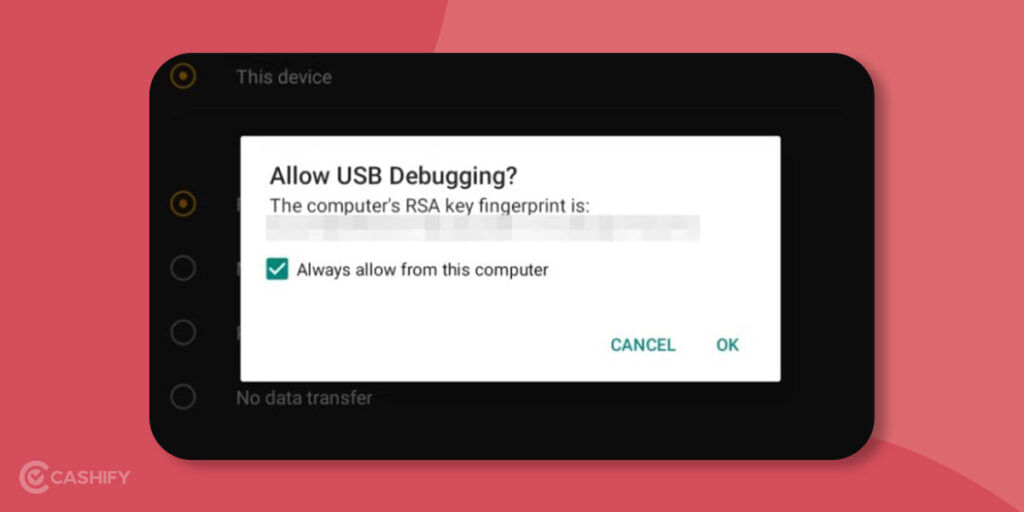
You should be able to see a Permissions Box popping up on your Fire tablet so simply select the check-in the checkbox that states ‘Always allow from this computer,’ then click OK.
Important Note- If you receive an error like ‘user is not in the plugdev group’ or your Fire Tablet goes undetected by P.C., then this is what you are supposed to do to resolve this problem-
- Search the notification on your Fire Tablet that states ‘Connected As.’ and click it.
- Click the option named ‘File transfer‘.
- Now attempt running ‘adb devices‘ again on your P.C.
Now you are at last prepared to modify and change the Launcher. Run the following two commands in your Terminal, one after the other, hitting Enter at the end of both the commands:
adb shell pm set-home-activity ch.deletescape.lawnchair.plah/ch.deletescape.lawnchair.LawnchairLauncheradb shell pm disable-user --user 0 com.amazon.firelauncher
After entering the above two commands, the Lawnchair2 should become your default launcher, and the Amazon factory settings installed Launcher will become disabled.
Try clicking on the Home Button and notice if the process was successful or not. Now add widgets and change the settings by holding down on the screen for a few seconds.
Also Read:4 Secret Methods To Get Free Disney Plus Hotstar Premium Subscription
2) Decide your Launcher to give Amazon Fire Tablet a stock Android feel
If you want any other launcher than Lawnchair2, you can do it, but you have to locate the correct file package name of the Launcher and the primary action of the Launcher.
Download your desired U.I. launcher from the Google Play Store. You are also required to install ‘Activity Launcher‘ to locate the precise function in the Launcher to start.
Click-open the Activity Launcher, and scan for the Launcher you want to operate in your Fire Tablet. Once you locate it, click on it to notice all the actions in the application.
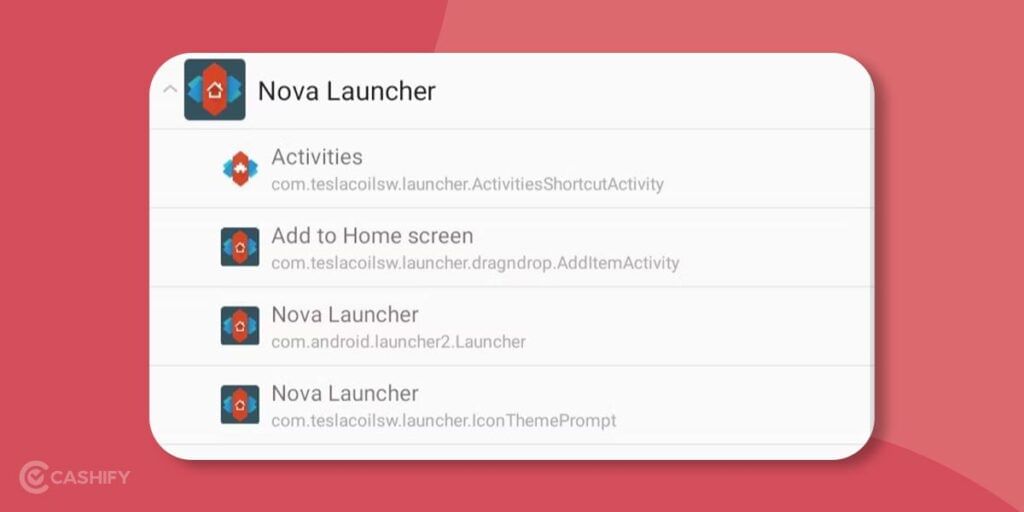
You need to be on the lookout for the primary action of the Launcher, i.e., the element in the Launcher that shows the Home screen. Such Launchers tend to end with ‘launcher’ or the application’s name. Clicking on the action will start it, so if you are able to locate one that simply opens the Launcher’s Home screen, you are sorted.
Also Read: 9 Best Smartwatch For Men In India 2022
There is one extra part you require to locate,i.e., the package name of the Launcher app. If you are aware of how to locate it, then simply download ML Manager from Play Store, and look at the series of characters detailed under the Launcher’s name in the list.
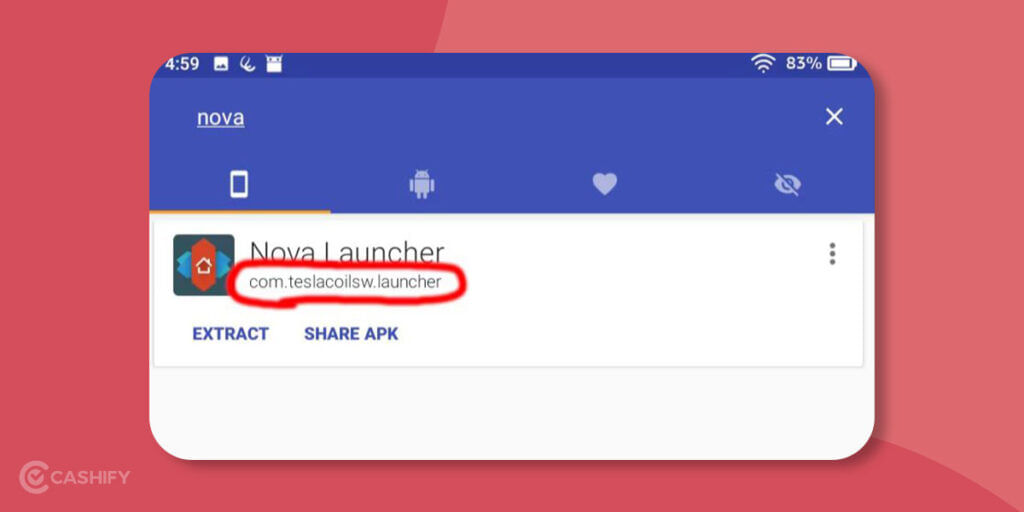
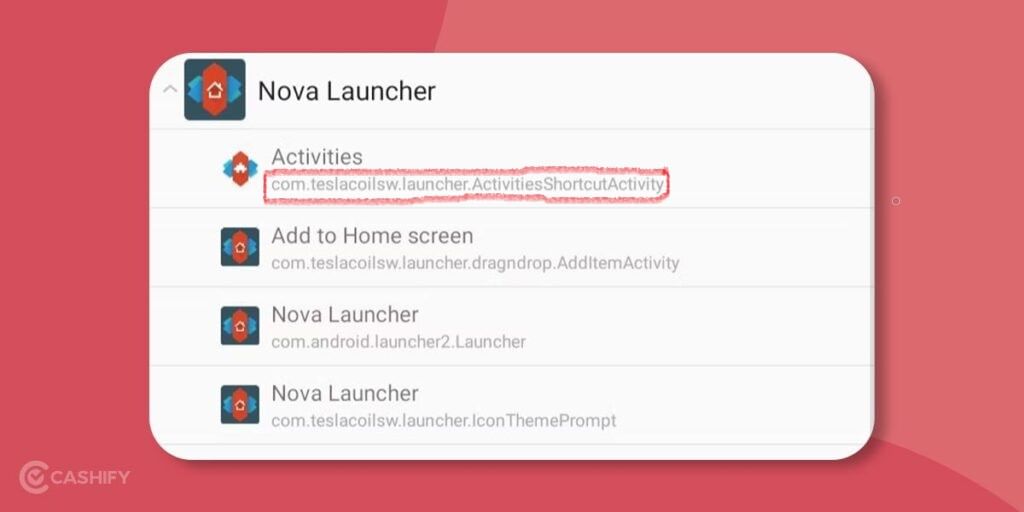
Since you have the action name and the package name, you now need to move to your Terminal/Command tab and execute the below command replacing ‘packageNameGoesHere‘ for the app’s package name that is the name for Nova Launcher encircled in red in picture above(Fig.1) and ‘activityNameGoesHere‘ for the activity name you found in Activity Launcher that is the text that is encircled in the image below(Fig.2)-
Important Note – The action name and package name may differ.
adb shell pm set-home-activity packageNameGoesHere/activityNameGoesHere
If in case a huge help page prints out in place of the ‘Success’ notification, then it means you have been using an older version of Fire O.S. that does not have that command functional. In such cases, you need to attempt this and ensure that you do not delete the quotes-
adb shell cmd package set-home-activity "packageNameGoesHere/activityNameGoesHere"
Finally, you need to disable Amazon’s built-in Launcher if you have not done it till now:
adb shell pm disable-user --user 0 com.amazon.firelauncher
Your Amazon Fire tablet should now operate the Launcher of your preference. Congratulate yourself if you were able to do all this and change your Launcher.
3) Reverting to the Amazon’s factory-installed Launcher
If you are facing problems with third-party Launchers, or you wish to revert to Amazon’s default Home screen, then execute both of these commands, one after the other, hitting Enter at the end of both the commands:
adb shell pm enable --user 0 com.amazon.firelauncheradb shell pm set-home-activity com.amazon.firelauncher/.Launcher
Following the above steps in Point 3 should restore your default Launcher.
Also Read: 6 Best Instant Grocery Delivery Apps In India 2022
Conclusion
Amazon Fire Tablet O.S is unique but it doesn’t offer much compared to your Android Tablets and we totally get it why you want to make your Amazon Fire Tablet feel more like a stock Android and we hope that all the step-by-step guide stated in this article does run its course successfully so that you can finally have the Google’s Android User Interface experience on your Amazon Tablet.
Also Read: How Can You Edit TextEdit Files On iPad?
Thinking about wanting a new mobile? Cashify offers the service at your doorstep. Thus, sell your phone online or recycle your phone in Cashify.