Ever been in the middle of work and wished you could just grab what’s on your screen in a second? That’s exactly where the screenshot shortcut saves the day! This innovation has been a simple yet huge blessing. Imagine you are collecting notes or saving something important. Or adding visuals to a presentation. Taking a screenshot can make your life a lot easier and make accomplishing tasks faster.
Most people know the classic Print Screen key, but that’s just one option. There are many quick shortcuts you can use on your laptop or PC. In this guide, we break down all the easy ways to snap your screen. Let’s explore some quick screenshots whenever you need them!
What Is A Screenshot & Why It Matters?
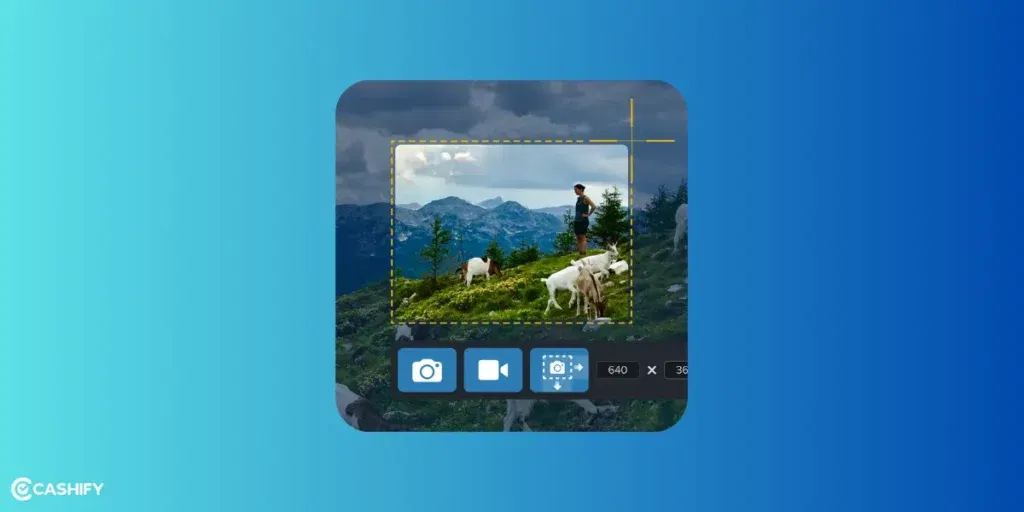
A screenshot is a really helpful feature. It lets you take a picture of whatever is on your computer, laptop, or phone screen. You can save this picture as an image and use it later when you need it.
Taking a screenshot just means capturing whatever is on your screen like a photo. You can do it quickly using shortcut keys:
- On most Windows computers, press Print Screen or Windows + Shift + S.
- On a Mac, press Command + Shift + 4.
These keys help you take a screenshot in seconds, without installing any extra apps.
Here are some reasons we use screenshots:
| Reason | Details |
|---|---|
| Show work or explain something | Screenshots help you show what you are talking about. |
| Share on social media or blogs | You can take a screenshot to share something cool online. |
| Save images for AI tools | Screenshots let you save pictures that AI can look at. |
| Use screenshot shortcuts | Shortcuts make it quick and easy to take a screenshot. |
How To Take Screenshot Shortcut In Laptop?
To take a screenshot on your laptop, it depends on your system.
How To Take Screenshots on Windows Computers
Let’s check some basic shortcuts:
| Shortcut | What It Does | Where It Goes |
|---|---|---|
| PrtScn | Captures the whole screen | Clipboard (paste into Paint or other apps) |
| Alt + PrtScn | Captures only the active window | Clipboard |
| Windows + PrtScn | Let’s you choose an area to capture | Pictures > Screenshots folder |
| Windows + Shift + S | Lets you choose an area to capture | Clipboard + Opens in Snipping Tool |
| Windows + Alt + R | Starts/stops screen recording (with audio) | Saves to Videos > Captures |
After using PrtScn, open Paint, press Ctrl + V to paste, then save it!
More Tools
- Snipping Tool: Open from the Start Menu. You can choose different shapes (rectangle, freeform, full screen). It can record videos and even grab text using AI.
- Xbox Game Bar: Press Windows + G to open it while gaming. Take a screenshot with Windows + Alt + PrtScn.
Also read: WhatsApp Money Heist Sticker Pack: How To Download and Send
How To Take Screenshots on MacBook? (macOS)
Macs don’t have a “Print Screen” button, but use Command shortcuts instead.
How To Take Screenshots on macOS (Sequoia 15.2)
| Shortcut | Action | Output Location |
|---|---|---|
| Cmd + Shift + 3 | Full screen | Desktop or chosen folder |
| Cmd + Shift + 4 | Select area | Desktop |
| Cmd + Shift + 5 | 2025 toolbar with screen recording, iPhone mirroring capture, and Live Text actions | Customisable |
| Cmd + Shift + 6 | Capture Touch Bar (still works on older MacBooks) | Desktop |
| Control + Cmd + Shift + 4 | Copies to clipboard (no file created) | Clipboard |
Making Screenshots Shortcuts On Laptop Quick & Easy
Here are some different situations where you can use screenshot shortcuts in the best way for quick action.
| Trick / Tip | Shortcut / Method | What It Does |
|---|---|---|
| Delay Screenshot | Use Snipping Tool > Delay (1–5 sec) | Lets you take a screenshot after a few seconds delay, useful for dropdowns. |
| Screenshot from Game Bar | Windows + G → Click camera icon | Opens Xbox Game Bar to take a screenshot while gaming. |
| Use Clipboard History | Windows + V after taking a screenshot | Lets you access recent screenshots saved in clipboard. |
| Use Snip & Sketch App | Open Start Menu → Search “Snip & Sketch” | Gives better annotation, editing, and sharing options than Snipping Tool. |
| Paste Screenshots Directly | After taking screenshot → Ctrl + V in Paint, Word, or Chat | You don’t need to save screenshot first – paste it directly. |
| Change Screenshot Folder Location | Right-click “Screenshots” folder -> Properties -> Location tab | Useful to save screenshots directly to a different folder or drive. |
| Auto-Save Snips Without Notification | In Snipping Tool > Settings > turn on “Automatically save snips” | Skips clipboard prompt; saves directly to Pictures > Screenshots |
Troubleshooting Screenshot Problems
Now, we understand that there can be issues when you are trying to capture a screenshot. In this section, we have analysed common problems while taking a screenshot and how to solve them. Let’s check it out:
| Problem | Simple Fix |
|---|---|
| Shortcuts not working | Turn off F-Lock, or try Fn + PrtSc. Update keyboard drivers or try another keyboard. |
| Screenshots not saving | Make sure the Screenshots folder exists in Pictures. Check disk space. If needed, paste into Paint and save. |
| Blurry screenshots | Set display scaling to 100% in Windows. On Mac, use Preview’s Optimise for Retina option. |
| Low quality screenshots | Update graphics drivers. Set display resolution to the highest setting. Save screenshots as PNG for better quality. |
| Snipping Tool opens instead of copying | Go to Settings > Accessibility > Keyboard and turn off “Use the Print screen button to open screen snipping.” Then PrtSc will copy the full screen again. |
Tips For Organising And Managing Screenshots
Now that you know how to take a screenshot on a laptop, here’s how to organise them:
- The best idea is to rename your screenshots right after you take them. This makes it easy to find later.
- You can create folders like ‘work’, ‘personal’, or any other name you like. Find your screenshots in Pictures > Screenshots.
- You can also sync your screenshots folder with Google Drive or another cloud service. This way, you can access them from any device.
- If you use a Mac, you can use the Tags feature in Finder to label your screenshots.
- Don’t forget to delete old screenshots every week or month to keep your files neat and organised.
Best Third-Party Screenshot Tools For Advanced Features
Along with the tips mentioned, you can also use third-party tools. They are great and can give you advanced features. Let’s check out the options:
| Tool | Platform | Key Features | Best For |
|---|---|---|---|
| Snagit | Windows, macOS | Scrolling screenshots, video recording + GIFs, advanced editing (text replace, templates, callouts), OCR, step capture for guides | Content creators, professionals, technical documentation |
| ShareX | Windows | Free & open-source, unlimited capture modes, scrolling captures, GIF/video recording, custom workflows, auto-upload to 80+ destinations (Imgur, Dropbox, etc.), OCR | Power users, automation lovers, frequent sharers |
| CleanShot X | macOS | Scrolling captures, instant annotations, seamless cloud sharing (custom domains), screen recording + GIFs, OCR, pinning screenshots, hide desktop icons | macOS users wanting the most polished & feature-rich experience |
| Flameshot | Windows, macOS, Linux | Privacy-focused users, developers, and cross-platform needs | Lightweight users, project managers, and quick everyday captures |
| Greenshot | Windows (excellent Linux/WSL support) | Free & open-source, region/window/fullscreen capture, basic annotations, direct Office integration, recent 2025 updates (zoom editor, security fixes) | Graphic designers and visual creators needing editing power |
| PicPick | Windows | Scrolling capture, built-in full image editor (effects, color picker, pixel ruler), annotations, multi-monitor support | Graphic designers and visual creators need editing power |
| Screenpresso | Windows | Lightweight, scrolling capture, built-in editor, drag-and-drop sharing, cloud upload (Google Drive, Dropbox), video recording | Users wanting simple yet professional results on laptops |
Quick Recommendations by Need (2026)
- Best overall professional tool: Snagit (paid, but worth it for advanced editing and video).
- Best free power tool: ShareX (unbeatable customization and sharing).
- Best macOS experience: CleanShot X (feels like a natural extension of macOS).
- Best cross-platform free option: Flameshot (beautiful annotations and privacy tools).
- Best lightweight Windows choice: Greenshot or PicPick (fast, no bloat).
Some Quick Tips To Take Better Screenshots
Here are some quick tips to take better screenshots.
- Adjust the display settings for improved clarity and visibility.
- Do not stretch or compress the image.
- Clear unwanted windows before you take a screenshot.
- Always save screenshots in organized folder for quick and easy access.
- For high quality, save the image in the best format.
- Make use of the right method to capture a screenshot, whether you want to capture a specific area, full screen, or an entire window as required.
Also Read: Here Is How Instagram Help Center Assists You With Your Account!
New Tricks You’ll Wish You Knew Earlier
- AI Text Extraction instantly : Let’s you extract text from images or scanned copies, and so on. After Windows + Shift + S > click “Text actions” > Copy all text / Redact sensitive info / Translate.
- Copilot Vision screenshot analysis: It helps you explain a screenshot or webpage, like summarising it in real time. To enable, Press the dedicated Copilot key (or Side + Windows + C on older keyboards) > “What’s in this screenshot about?” > AI explains charts, code, or memes. It launched on all Copilot+ PCs from June 2025 onward.
- Auto-remove background: Removes unwanted background. It is present in macOS Sequoia. Open screenshot thumbnail > click “Remove Background” (no Photoshop needed).
- Scrolling screenshots natively: It is the same as the capture more button. It can take screenshots as we scroll down the screen, rather than just taking a shot of whatever is there in the present static screen. Edge & Chrome Canary now have “Capture full page” built in. Right-click > Copy or Save as PDF. It became a default in Chromium 131 (Nov 2025).
Screenshot Workflow That Saves Time (Power-User Habit)
If you take screenshots regularly for work, studying, or content creation, this simple workflow can save hours every month:
- Capture > Clipboard (not file): Use shortcuts that copy directly to the clipboard.
- Paste directly where needed: Word, Docs, WhatsApp Web, Notion, email. No need to save first.
- Rename only important screenshots: Don’t rename everything. Rename only files you’ll keep long-term.
- Weekly screenshot cleanup (5 minutes): Delete duplicates, blurry shots, and outdated captures.
This keeps your system fast and your folders sane.
Best Screenshot Format to Use (Quick Guide)
| Use Case | Best Format | Why |
|---|---|---|
| Text, UI, tutorials | PNG | Sharp text, no quality loss |
| Photos or visuals | JPG | Smaller file size |
| Long webpages | Easy to scroll & share | |
| Quick sharing | Clipboard | No file clutter |
One-Line Pro Tip for 2026 Users
If screenshots are part of your daily work, master clipboard-based screenshots + AI text extraction. It’s faster than typing, copying, or even bookmarking.
Frequently Asked Questions!
1. What is the basic Print Screen shortcut on Windows laptops/PCs?
Press the PrtScn (or Print Screen) key alone to copy the entire screen to your clipboard. Paste it (Ctrl + V) into an app like Paint or Word to save/edit. For automatic saving, use Windows key + PrtScn. The screen dims briefly, and the file saves to Pictures > Screenshots folder.
2. How do I take a screenshot of just one window on Windows?
Click the window to make it active, then press Alt + PrtScn. This copies only that window to the clipboard. Paste it into an editor to save.
3. What if my laptop keyboard doesn’t have a dedicated Print Screen key?
Many compact laptops combine it with another key (e.g., Fn + Insert or Fn + some F-key). Alternatively, use Windows key + Shift + S to open the Snipping Tool for flexible captures, or Fn + Windows key + Space Bar as a direct alternative on some devices.
4. How do I capture a specific area of the screen on Windows?
Press Windows key + Shift + S. The screen grays out, and you can drag to select a rectangle (or choose other modes). It copies to the clipboard with a notification for quick editing/saving.
5. Where do screenshots save automatically on Windows?
Full-screen shots via Windows + PrtScn save as PNG files in This PC > Pictures > Screenshots. Clipboard captures need manual pasting and saving.
6. What are the screenshot shortcuts buttons on a MacBook or Mac?
The screenshot shortcut buttons on a MacBook usually have Command + Shift. Then it is followed by another button depending on whether you need full screen(3), a part, a specific window (4 then space, etc.
7. How do I copy a screenshot to the clipboard instead of saving a file on Mac?
Add Control to any shortcut (e.g., Control + Command + Shift + 3 for full screen). Then paste (Command + V) into apps like Preview or Messages.
Also read: How AI Is Replacing Traditional To-Do Apps? Know The Truth!
8. Why isn’t the Print Screen key working on my laptop?
Often requires pressing Fn (Function) key simultaneously on laptops. Check your keyboard layout. PrtScn might share a key. If still not working, remap keys in Settings or use alternatives like Snipping Tool.
9. Can I edit screenshots right after capturing them?
Yes! On Windows, Snipping Tool notifications let you annotate instantly. On Mac, a thumbnail appears in the corner. Click it for quick markup in Preview.
10. How do I take screenshots on a Chromebook (common school/work laptop)?
Ctrl + Show Windows (window overview key): Full screen. Shift + Ctrl + Show Windows: Partial/select area. Screenshots save to the Downloads folder.
11. Is there a way to take scrolling screenshots (long webpages)?
Built-in tools don’t support this natively, but browser extensions (e.g., in Edge/Chrome) or third-party apps like Snagit/Lightshot can capture full pages reliably.
12. Are there better alternatives to the classic Print Screen for frequent use?
Yes. Windows Snipping Tool (Win + Shift + S) or Mac’s toolbar (Command + Shift + 5) offer more options like delays, annotations, and video recording. Set PrtScn to directly open Snipping Tool in Windows Settings for faster access.
Also Read: Five Things You Didn’t Know About Google Gemini AI!
Conclusion: Screenshot Shortcut In Laptop
In the end, I hope you now know all the common ways to take a screenshot. It doesn’t matter if you use a laptop or a computer, Windows or Mac, there are easy shortcut keys for every device. Many keyboards even have special buttons made just for taking screenshots. These built-in shortcuts are the main and fastest way to capture your screen. Once you learn them, you can take a screenshot in just a few seconds. You can also use quick methods to open these shortcuts. Use screenshots in your PPTs or for rough work.
Still got some doubts? Just share it in the comments below, I would love to help you out.
Also read: How To Get Google Gemini AI Pro for Free: Step-by-Step Guide!
If you’ve just bought a new phone and don’t know what to do with your old phone, then here’s your answer. Sell old mobile to Cashify and get the best price for it. If you are planning to buy a new phone, check out Cashify’s refurbished mobile phones. You can get your favourite phone at almost half price with a six-month warranty, 15 days refund and free delivery.


